
First Flights in late May, 2005
Set up for ballasted flight at 11.2 ounces per square foot wing loding, to 14.5 ounces per square foot wing loading for high winds / lift
Flying well in ~15 to 20 MPH Winds on KENOSHA lower slopes in early June of 2005, when ballasted at 11.2 ounces per square foot.

Minimum Flying Weight unballasted at 35 Ounces, for light lift conditions
Maximum Ballasted Weight 58.75 Ounces; flew smoothly in 35-40 MPH winds at this wing loading at KING in late may of 2005

Yes, any glider can be flown in slope lift, depending upon wind conditions... there are several photos on this web site of other gliders I've built & flown over the years at various slope flying sites. But there are certain types of gliders specifically designed for slope flying in high wind / high lift conditions. Here are photos of four of my slopers, along with some information on Bungee Launching techniques and the special tow hook placements / installations used in bungee launching two of these slopers.
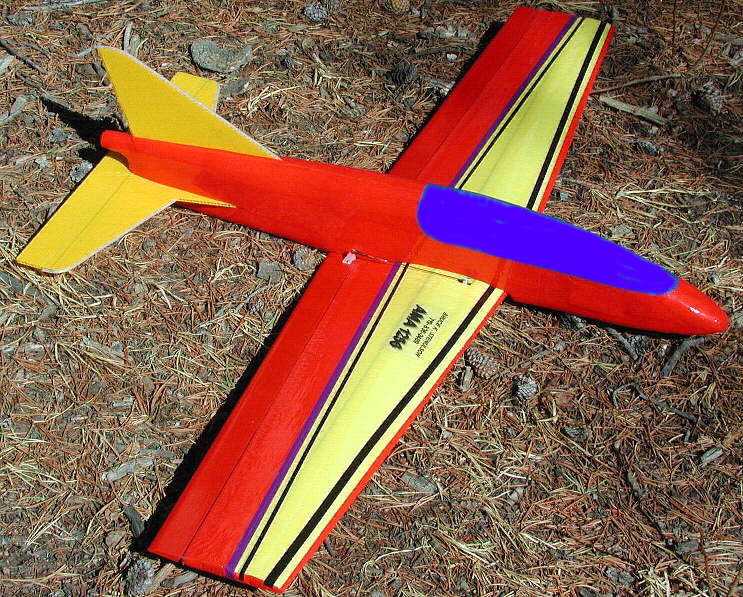
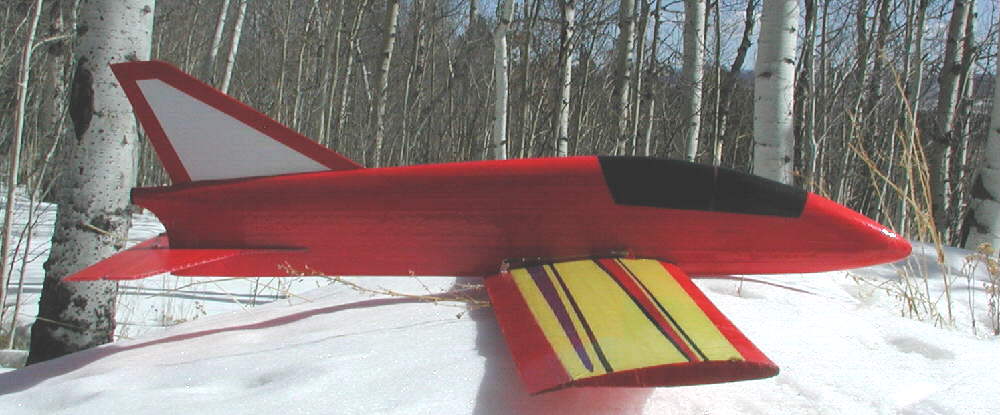
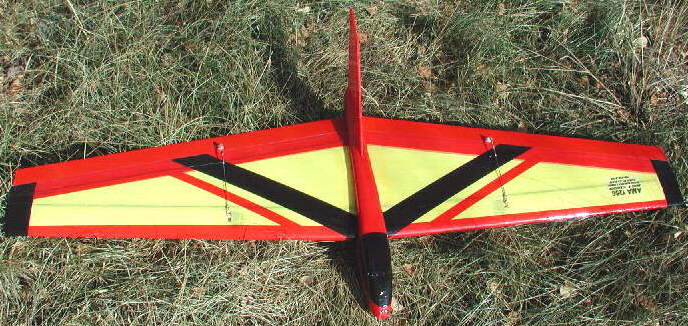
This is one of my favorite kit slope ships, the BD-5 From S&R Hobbies. This one is flying at 22-1/2 ounces. It's handling well; the large tail group contributes to it's stability.
I take this one along many days when I leave the house, just in case I'm passing one of the many slopes here in the mountains, and the winds are favorable, and I have some extra time to pause and fly. (It seems like there should always be enough time in our lives to pause to fly, even if for only a few minutes!!!)
When preparing to build this kit, I decided to modify it slightly; (I'm afraid I just can't resist the urge to "personalize" anything I plan to fly! :>) I epoxied two 1/8" birch ply plates, set flush into the EPP foam fuselage, and two more onto the lower surface of the wing at the leading and trailing edges, so that the wing could be mounted in place with four #8 pan head sheet metal screws. This keeps the wing nicely aligned and located.
These wing mounting screws also help in quickly mounting my ballast weight for high wind flying conditions; it's a sheet of 1/16" thich lead about 2" wide by 9" long that goes in place on the belly when the winds get up over 25 MPH.
I used a pair of HITEC HS-81 mini servos mounted in the wing leading edge for the ailerons, with the linkages very close to the fuselage. I used another for the elevator, burried in the fuselage in front of the wing leading edge on the left side. The receiver I used is a standard sized Airtronics 7 channel model, friction fit in a recess on the right side under a flush fitting coroplast cover plate. I added a coupler just off the receiver case in the antenna wire, and then cut a slit in the epp foam that curves and zig-zags back and forth from one side to the other over the top of the fuselage, resulting in no antenna wire left to extend beyond the end of the fuselage. It's flying fine with this antenna installation!
NOTE: I'm flying all three of the EPP Slopers shown on this page on one AIRTRONICS RADIANT Computer Transmitter on channel 27. My ZAGI THL (not shown here yet) is on Channel 30; [most of everything else I fly is on 27- I have many of my aircraft on that channel.] I mention this so that, if you ever get a chance to join me flying the Slopes of Colorado, you'll know which channel is ALWAYS busy! :>)
The battery is a custom 4 cell N500A pack buried well forward in the nose. The final balancing still required adding some lead in the nose, burried in a slot in front of the battery.
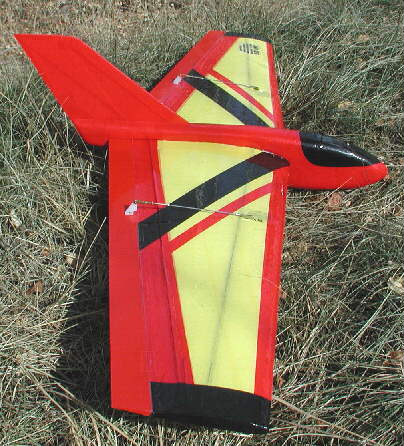
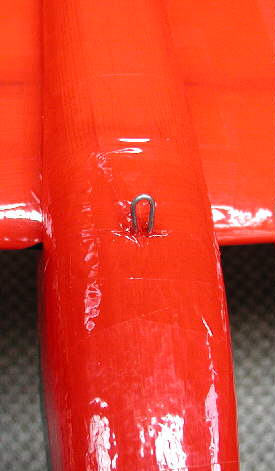
This BD5 is now also set up with a bungi launch tow hook (see further info below.) The hook is lacated at the leading edge of the wing, taped to the wing with strapping tape, and then covered with more of the colored packaging tape. The BD5 handles very nicely on the bungi launch- smooth and predictable!
You'll also notice a 'white line' in the photo above at the leading edges of the horizontal and vertical stabilizers; I used some 1/8" diameter plastic tube to clean up the drag characteristics of the coroplast material; I taped it in place with 3/4" wide scotch "Crystal Clear Tape". I also taped a section at the trailing edge of the elevator.
My balsa ailerons are also sanded to a thin trailing edge before covering with Ultracote. I then use the same tape to hinge the ailerons to the wing; I use a full length piece on both the top & the bottom, with about a 1/32" hinge line, where the top & bottom pieces of hinging tape touch each other. This hinging material & method are extremely durable while allowing free flexing of the hinge without slop or air leaks; it's become my favorite method for the EPP Slpoe ships.
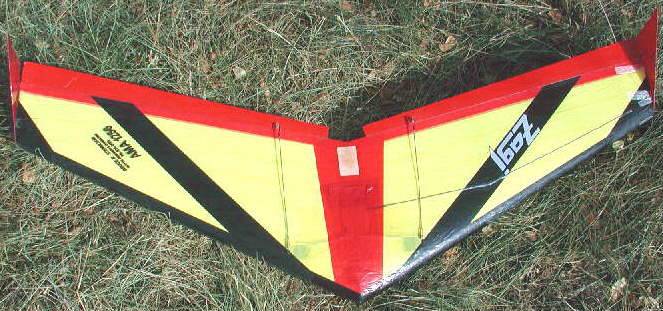
My ZAGI 3C, shown in the photo above, is built with light servos and a 270mAH receiver battery, flying at about 17 ounces, and has been flown without added ballast in winds from 45 MPH to 50 MPH on the NE shoreline of Antero Reservoir in the spring of 2001.
The above photo shows some of the center top detail of my ZAGI 3C. My servos are a bit farther forward than the kit instructions call for; my receiver battery is forward of the carbon fiber spars, and the HITEC 555 receiver is just behind the front carbon fiber spar. This leaves room for a ballast compartment on the CG that can presently carry up to 12 ounces of sheet lead if desired. (I really didn't use any of the precut cutouts in my setup- I glued the pieces back in place with the 3M 77 spray adhesive.) My 3C still carries close to 2 ounces of lead under the nose to balance at 7.7" back from the nose.
The "Super 77th Squadron Slope Combat Fliers" build the ZAGI 3C version as a Slope Combat plane, commenting that it out-performs about all of the other 48" class planes on the slope on light wind days. They typically build them heavier for combat at around 21 ounces, using larger metal gear servos.
For slope Combat flying, I understand that the servo arms are one of the two points most suceptable to damage. Using the servo wheels, rather than the small servo arms, might be a very good choice. The control horns on the elevons are the next item that takes a lot of damage in hard core slope combat flying. Plan on having spare parts & extra tape, etc. on hand if you decide to try combat flying! (Good field repair skills and preparations are reportedly an appreciated skill on the combat slopes!)
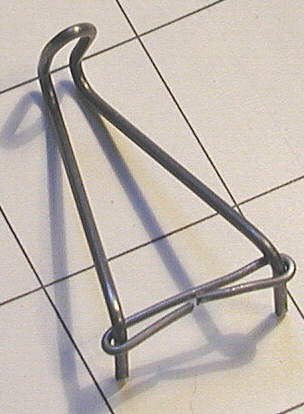
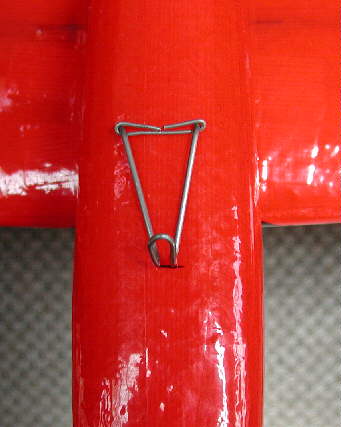
Towhook location for bungee launching is well forward of the locations that might be used with winch or high start on other gliders. On my ZAGI 3C, I bent a piece of 3/32" music wire into a triangular configuration to allow plenty of tapeing surface & bearing area. It's laid outbetween the two finger hole cup positions in the photo above. There's an extension point from one end of the triangle going into the foam about 3/4" ,at a point just behind the junction of the two forward carbon fiber wing spars, so that launch forces are also carried by the spars. The tow hook portion is then bent up away from the wing surface, with the actual tow cord ring riding 4" back from the 3C's leading edge, or about 1/4" in front of the front point of the carbon fiber wing spars. (That's 3.3" in front of the balance point the way I'm set up on this 3C.)
You'll notice a square patch of adhesive backed sandpaper just close to the trailing edge of the under side of my ZAGI 3C in the photo above; there's another piece oposite it on the top surface, too. These provide a secure gripping area for holding the ZAGI on the end of the stretched out bungee cord, ready to release. I hold the ZAGI in my left hand, thumb on top, while the radio transmitter is in my right hand with my thumb in place on the right stick. (Yes, I fly single stick on all slopers & gliders.)
I bought one 50' section of the small bungee cord from Multiplex; I attached a 1" welded steel ring to the aircraft end of the bungee cord, (cord wrapped, tied , & super glued so it can't slip!) and a heavy duty snap coupler is used to attach to my ground stake on the other end. For our rocky soil here in the mountains of Colorado, I use a 12" spike to anchor the ground end of the bungee cord, driving it in at about a 20 degree angle. (I've never had it loosen or move at all yet.)
Launching should be straight into whatever wind direction is prevailing. Keep in mind that the aircraft will likely be reaching groundspeeds of well over 60 MPH at release. (Don't do this to a light balsa structure glider!) Things happen fast, and by the time the bungee cord is reaching full contraction, you should be fully ready to react quickly. That's within about one second of release. It's really quite a rush, to say the least!
[When I pace, I cover almost exactly 1 yard with each long pace.] Initial setup launches for a new plane on the bungee launch can be done with as little as 20 paces of stretch on the bungee cord. For normal flights, I use about 28 yards/ paces of stretch. At 32 paces, I've experienced some strange launches; likely it's beginning to crowd the torque capabilities of the mini servos I used on the elevons on my 3C. On one 32 pace stretch launch into a 35+ MPH wind, the elevons went into audible flutter as max speed was approached & reached! So yes, you can get 'too much stretch' on the bungee cord for the way a particular aircraft handles off the bungee launch!
A balance point even a bit farther back on this ZAGI 3C might be appropriate, with correspondingly less reflex on the elevon trim position, for optimum bungee launch handling. Further experimentation may be indicated. The tow hook configuration and positioning seems to be perfect.
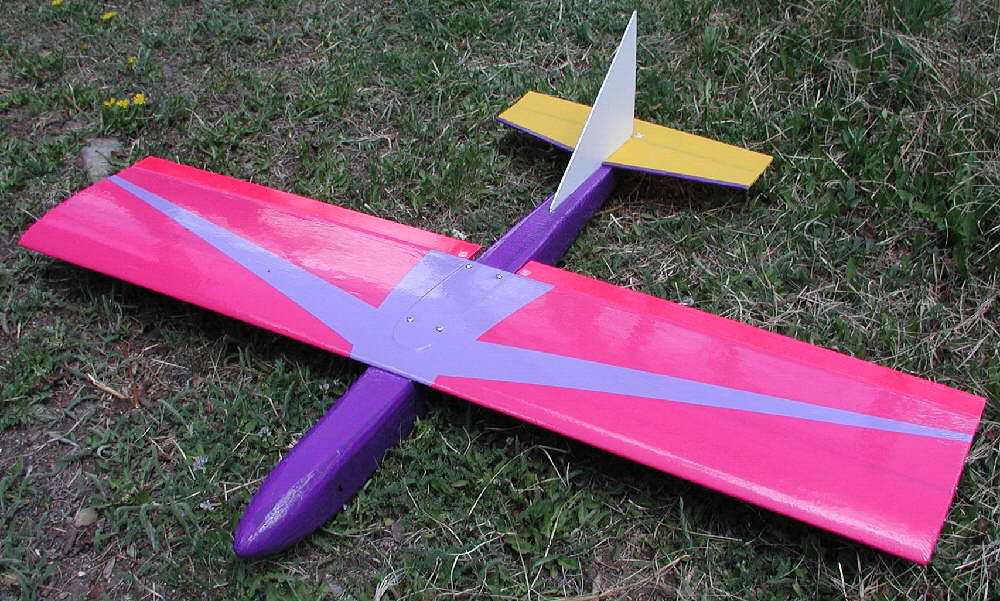
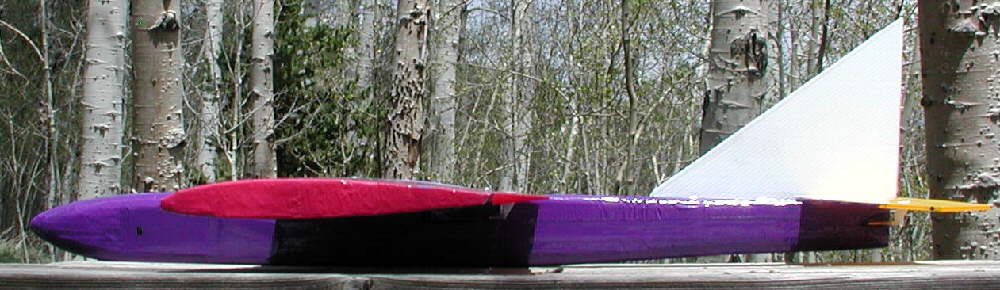
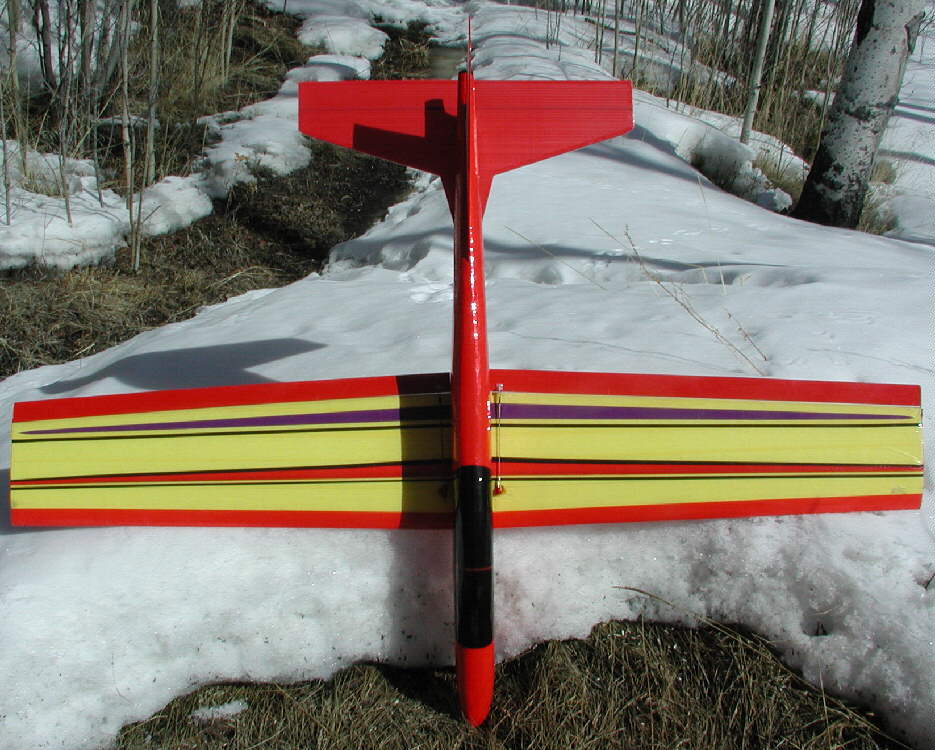
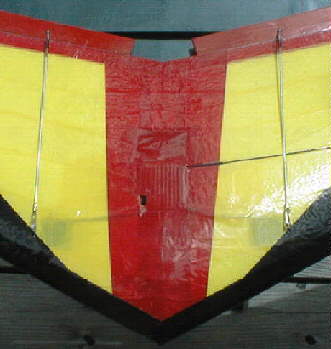
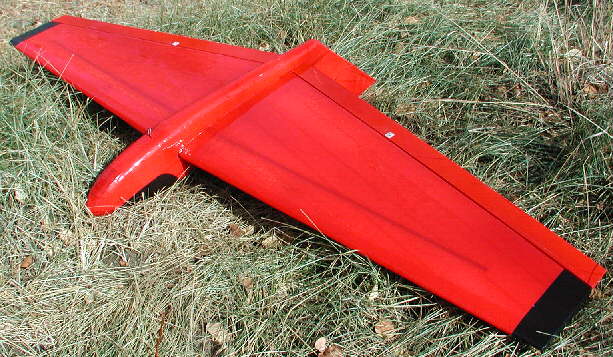
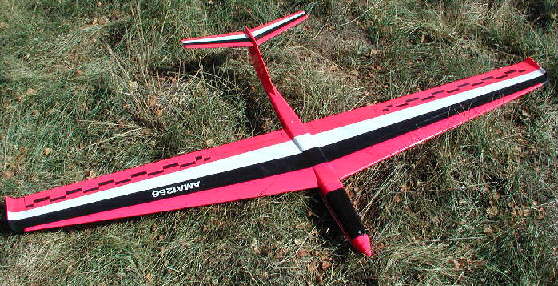
I started fying this Sloper on November 3rd, 2001, and have had it out on several occasions since then. This aircraft was designed for minimal drag, and it moves out well.
The wing cores are cut from a single 4" thick block of 2 pound EPP foam, with two main carbon fiber tubular spars each top & bottom, plus a short ~6" spar in the center top surface closer to the wing trailing edge. The vertical stabilizer is a section of 1/8" thick Cloroplast material. This is a 54" wingspan Joe Wurts design, intended for "Dynamic Soaring".
In consideration of our thinner air at this high altitude, I decided to initially build the aircraft as light as I could. I therefore placed the DYMOND 200 BB mini servos (rated for 35 inch ounces of torque) forward of the top carbon fiber spars, built a 4 cell N500A battery well forward in the nose, and installed the HITEC 555 receiver under a foam hatch in the forward fuselage top. The resulting final setup only required about .8 ounces of sheet lead added to the nose to balance to fly well, for an all up weight of about 21.5 ounces. (Recommended parts placement & setup builds into a 32 ounce sloper according to the info supplied with the kit, as a comparison.) My thoughts in doing this: You can always add ballast weight, but for light lift days, it's hard to reduce the wing loading if you don't plan for it in the initial setup stage.
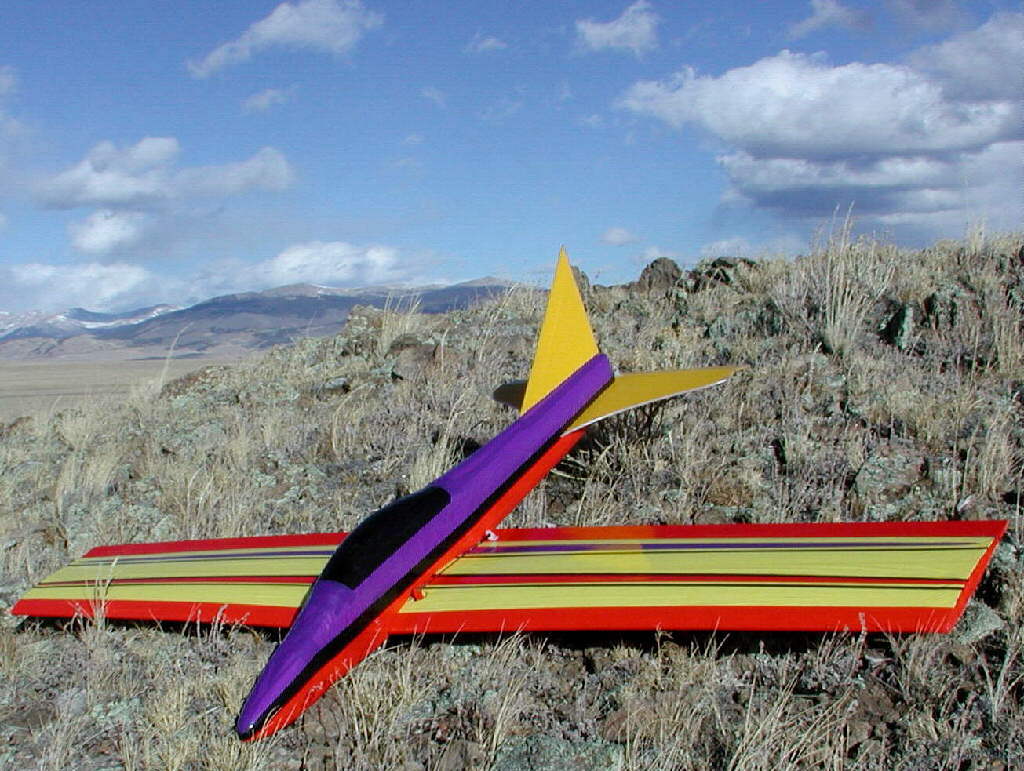
The JW does not supply / specify a trailing edge piece. I decided to add one, 1/8" x 1/4" firm balsa. I also beveled the Elevon leading edges on the underside. After assembly, I installed tape hinges on the top surface, followed with the second layer of tape on the underside. With an aircraft of this configuration that uses so little travel for full elevator function, I wanted to get as tight a set up on the elevon control as possible. I used solder clevises at the servo end of the 1/16" music wire elevon control rods, and thraded couplers & metal clevises and #2-56 locking nuts at the elevon horns to keep the linkage as tight as possible, with the best adjusting sensitivity. In doing final elevon trim setup, a half turn on the clevis at a time was used in getting to the exact trim setup, with radio trims centered on both axis.
I also kept the wing tip profiles full-chord rather than following the sugestion to round them, wanting every square inch of wing area. At 21.5 ounces with 3 square feet of area, this JW is flying at a wing loading of just over 7 ounces per square foot, allowing for very good handling at low speeds & in lighter lift conditions- a good approach in our thinner high altitude air. Ballasting weight will be temporarily taped in palce on the belly when desired for high wind conditions as needed.
I decided to use the ULINE 2.2 mil colored packaging tape for final covering after all of the nylon filament tape was in place, keeping with the same general color scheme I've found so recognizable on my ZAGIs. I hinged both elevons last after the rest of the covering and assembly was completed
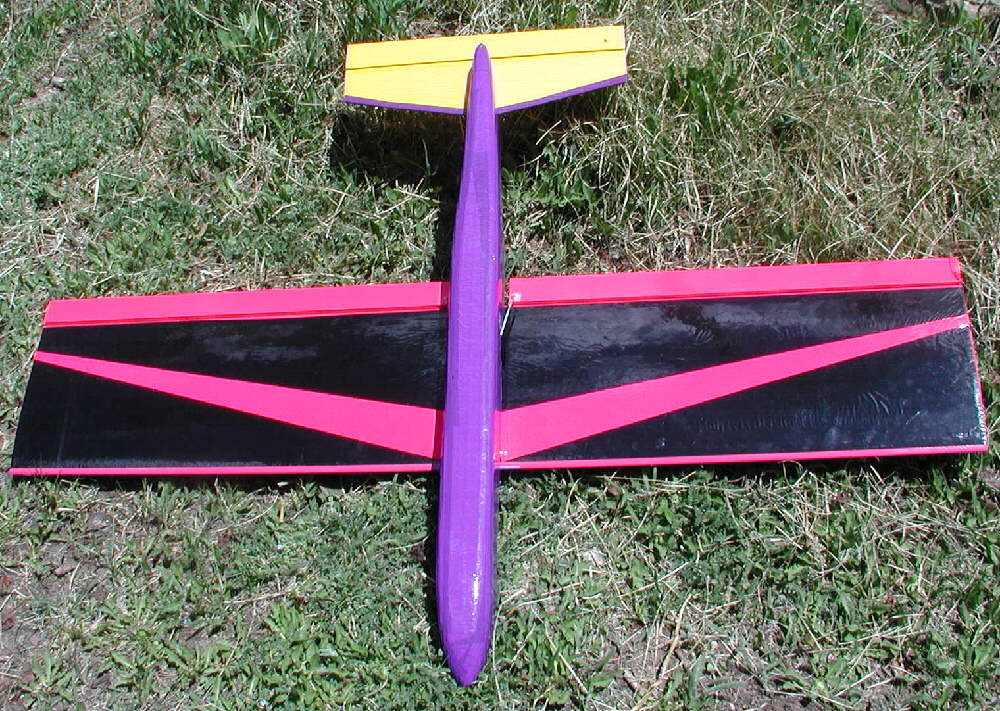
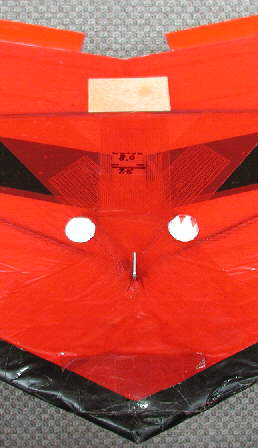
The photo above shows the underside with the tow hook in place for Bungee Launching. Initial flights to complete control throw setups and balancing were done with a Bungee launch system on local hay meadows. I set it up initially to be flown with an Airtronics RADIANT transmitter, which proved to be an essential choice, as I continued to reduce the elevator function throws several times before being happy with the handling. Once set up & trimmed properly, it handled fine off the Bungee Launch... but there were a lot of ugly launches involved in getting to that point! (grin) I'll soon move this plane to an Airtronics RD6000 Super transmitter, so that the exponential rates can be set up; (the Radiant transmitter did not have exponential rates.)
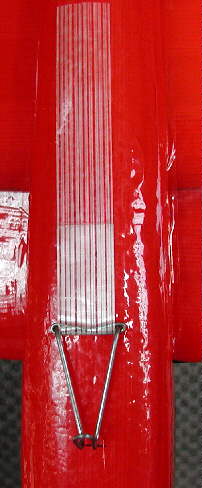
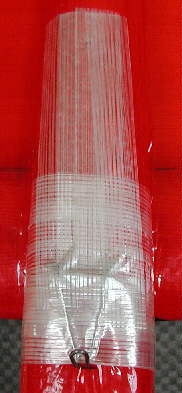
After the first series of test flight launches with the Bungee launch system, I decided to move the launch hook another 1" forward from the position shown in the above photos, to a point 4-3/16" in front of the wing's carbon fiber spars/ balance point. Handling on the launches was greatly improved in doing so, so that I became very happy with the JW's bungee launching characteristics.
The balance point I ended up with is actually at the center of the swept spars about 1-5/8" out on either side of the fuselage. It balances level on my thumbs at these points. There's still a bit of tendancy to balloon coming out of fast shallow dives, and I tried shifting the balance farther to the rear to eliminate this, but it becomes less stable and less smooth in the handling behind this point. I'll likely develop a better feel for flying it as I have more air time on it.
FLYING CHARACTERISTICS: Forward glide ratio is good on this aircraft, but it's a busy plane to fly without exponential rates, being so close-coupled. Handling is reasonable even at modest forward speeds, but it's my impression that you need to keep flying it attentively at all times. The landing handling is very managable (especially once I had the elevator throws reduced to a reasonable level... ) Exponential rates on both the Elevator and Aileron functions would be very useful, as well as servos with minimal 'dead band' in addition to the tight linkages mentioned previously. This is an aircraft that was designed & intended to be covering a lot of sky- a minimum drag design that likes to be kept moving.
KIT MISSES: One piece of elevon stock supplied with my kit was thicker & substantially heavier than the other, requiring extensive reshaping before they could be used. I also had to remove a lot of material to end up with a straight leading edge on both pieces. I realize it's hard to buy wood in bulk & end up with straight, consistent quality & weight... but the pieces I found in the kit box didn't come close to matching. For a kit costing $30.00 more than a ZAGI 3C kit, for instance, I'd somehow expected a bit more.... Hopefully this won't be an issue for anyone else considering buying this kit.
Above is my Dynaflight Freedom, built from the kit back in about 1985. It was built with the inboard landing flap / air diverter / air brakes, as well as the carved Horner wing tips. This is a 72" wingspan aircraft.