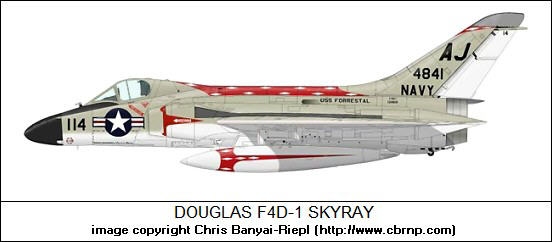
It was flown by the U.S. Navy as an aircraft carrier based interceptor; it could climb to 49,000 feet in 2-1/2 minutes.

Glen Weber (GPW) designed a model of the Douglas F4D Skyray in June of 2004, and another inMay of 2007. Early in 2009, the pencil-drawn plan was scaled up to ~28" span; it is available in post # 748 on page 50 of the RCGroups SKYRAY discussion thread. This is a long discussion thread with some good information and examples of what others have built. Our ongoing thanks go out to Glen Weber for all of the inspiration he continues to offer!

Above and Below: These are the templates and plans for the final layout of the SKYRAY which I built; photos below detail more of the build; the cutting mat behind the vertical fuselage structure templates are a 1" grid; the graph paper of the plan sheet below is also a 1" grid.

On my 'stand-off-scale' build of the Skyray, I'm using Bluecor PP - (I had stashed some away a couple of years ago while I could still get it locally.) I'm not so concerned with keeping a strictly scale profile, or about building a lightweight floater... I'm working more from a 'standoff scale' mindset, while building an aircraft which will handle high speeds without any problems of airframe twist or control surface flutter.
The 29" span wing is built with a thin KFm2 variant airfoil, with the leading edge heavily carved, sanded, then heat-formed into an airfoil shape. It has a cleanly shaped leading edge which should allow this aicraft to fly without being pitch-sensitive (as many flat-plate-winged aircraft can be), and the drag should be minimal. The upper layer of the wing is also thinned as it approaches the wing tips, to further minimize drag.
I decided to build a 2" deep under-fuselage, and tripled the thickness on the forward lower fuselage area where I'll carry the 3S 1050 Rhino battery pack and mount the ESC; this will keep most of the weight low & centered, for good neutral stability. I also lowered the profile of the forward upper section of the fuselage to avoid having too much vertical surface area forward of the CG, and slightly increased the vertical stabilizer's area to help stabilize the added under-fuselage's extra area. This Skyray build also lost the wing's leading edge 'shoulders' where the air intake ducts for the jet engine are found on the origional aircraft; I opted for a clean flowing profile in this area of the wing's leading edge.
I also increased the height of the under-fuselage rear end just under the tail & motor, to protect the 7" prop on landings- especially useful in the rough landing conditions out on the native short-grass prairie where I fly most of the time. (These design variations are in the spirit of 'stand-off scale', with just a bit of 'artistic license' exercised, while also trying to end up with some clean flowing lines to this Skyray variant.)
The CF2812 1600 Kv motor will be turning a 7x6 prop for first flights. It's mounted on a 1/16" birch ply bulkhead, with a couple of firm 1/2" balsa triangles tieing it in forward to the rear wing stiffener set, and sheet balsa farings fit to clean up the airflow.
Here's a preview of my progress so far- I'm ready to install the servos and linkage next, then add the extended motor wires forward to the ESC's mounting position. The airframe structure, with the motor mount completed, weighs 5-1/4 ounces.
I'll likely paint this SKYRAY in non-scale colors- Bright yellow above with hot orange and black trim, and mostly black below with some bright trim.
Flying weight on this build is estimated to finalize at about 13 ounces before paint or trim is added; the final flying weight after all of the Fluorescent orange trim tape was applied is at 13.75 ounces.
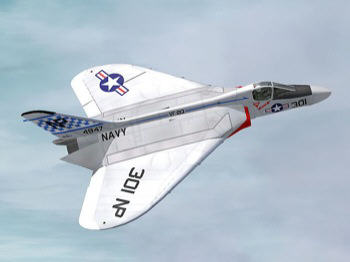
I do love the lines of the Skyray- it looks fast just sitting still!
I gave up on the idea of painting- 'tis NOT the season for that.... so after doing the edge reinforcing by ironing on narrow strips of 3 mil thick document laminating film, I added the 2" wide fluorescent trim tape to give it plenty of visability. After the trim job, the flying weight is at 13.75 ounces, so the wing loading is at 5.73 ounces per square foot.
With the afternoon passing, I went down into the wide-open flats to do the test flight. Temperature had made it up into the upper 20s, and a NW wind was varying from 5 to 15 MPH- no problem. I installed the Rhino 3s 1050 battery on the velcro with the balance set up conservatively, grasped it by the canopy, throttled up to ~3/4 of max, and gave it a light toss at a 30 degree nose high attitude.
The Skyray climbed out smoothly and strongly- no trim changes were needed at all. I climbed a bit, maxed the throttle, and started putting this fine aircraft through it's paces. WOW!! :D:D:D The control response is clean and precise; the roll rate, even on my low rate setting, is faster than I care to try to count... on high rates, It rolls very axially at a ridiculous rate!
It flies inverted very easily, loops cleanly and as tightly as I could ask for, and ignores the gusty wind conditions which were prevalent. It will also slow down and still fly through maneuvers very cleanly; the smooth handling is so fine, and the stability is all I could ever ask for. When going from low throttle to wide open, there really is no noticable motor / prop torque affect on the airframe. The 7x6 prop on this motor and battery is a good match.
At full throttle, it covers a lot of sky in a very modest amount of time... yet it can slow down and loaf around easily on the other end of the speed envelope.
There is absolutely no detectable pitch sensitivity on this thin KFm2 wing build- it's doing exactly what I wanted it to do. It's a rock solid flyer with eye-catching sweeping lines that handles the sky with authority!
Thanks again, GPW, for your fine inspirations & encouragment!! This 29" SKYRAY is a definite keeper!!!
Here's a 45 MB .AVI format uncut video of the SKYRAY being flown on 11-27-2009. It may be best to right-click on this linked file name, select "SAVE AS", and let it download onto your computer. Then you can view it smoothly once the download is complete. (Wish the video was higher resolution, but it gets far more bulky, so this will have to do. I shot this video using a 'helmet camera' setup, as I was flying alone this particular afternoon.)
Wingspan: 29"
Wing Area: ~348 square Inches = 2.4 Square Feet
Flying Weight 14 Ounces after all Fluorescent orange and dark blue trim tape was applied
Wing Loading : 5.83 Ounces per square foot
Overall Length: ~36"
Materials Of Construction: Bluecor PP with Balsa reinforcing of ply motor mount; Wing uses a thin KFm2 variant airfoil
1mm solid CF rods used in opposing pairs as structural stiffeners (.086 ounces for 2 meters of length used)
1.5mm CF rods used for elevator and rudder control rods
Motor Used: E-Max CF2812 1600Kv Brushless Outrunner
ESC : Turnigy 20 Amp 'Super Simple' programmable
Battery: 3S 1050 mAH Rhino LiPoly
Propeller: 7x6
Peak Static Current Draw 15.2 Amps = ~170 watts input power
Radio Receiver: Corona 4 Channel Single Conversion, with modified base loaded short antenna
Transmitter Used: Airtronics RD8000
Servos: two HXT900 9 gram servos for Elevons

Above: Airframe structure completed

Above: Underside of the Skyray; this wing uses 2 pairs of oppposed 1mm C.F. rod stiffenters, inset in shallow grooves flush with the surface of the foam on top & bottom, directly above / below each other. You can also see that the lower fuselage is 2" deep, alowing it to carry the 3S 1050 Rhino battery vertically. The 20 Amp ESC will also be installed below the wing, recessed into the lower fuselage's foam to minimize drag and protect it on landings, while having it's heat sink surface exposed to the air for cooling.
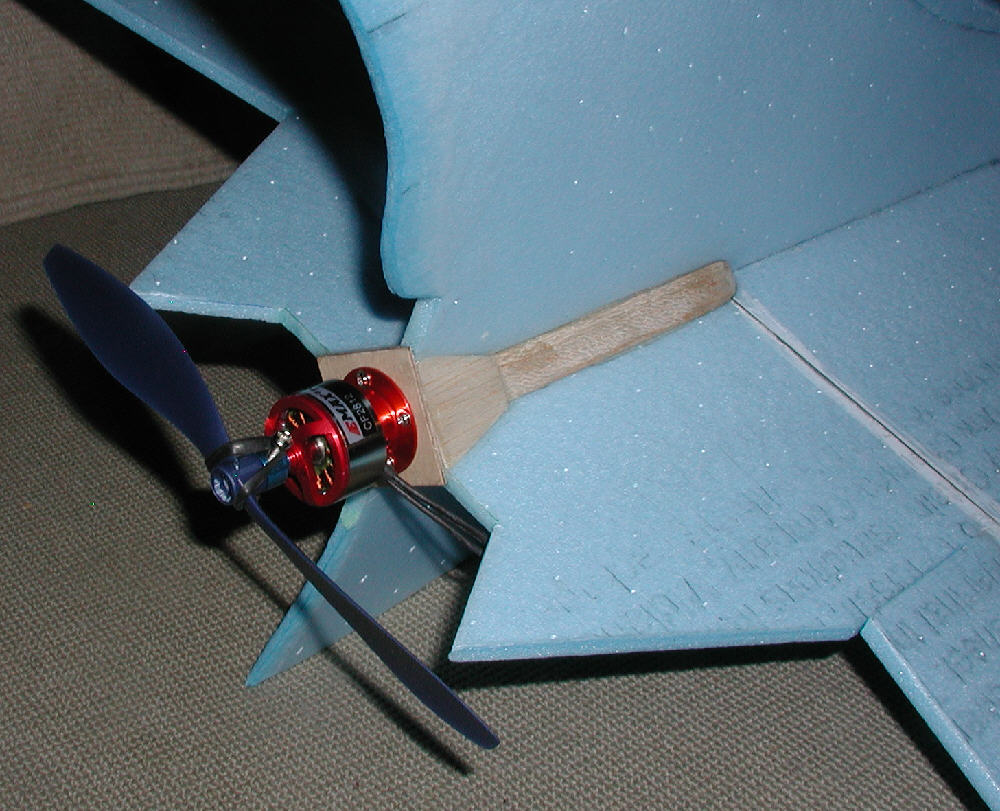
Above: Motor installation detail for CF2812 motor and 7x6 prop; tail end of lower fuselage extends below the wing far enough to protect a 7" prop on landing.

Above: Another view of the motor mount firewall

Above: Lower fuselage had side doublers added on either side of the main piece before it was glued in place with 5 minute epoxy

Above: Upper fuselage piece being held in place vertically between the old batteries while the 5 minute epoxy sets up; the wing is siting on two matching boxes so that the lower fuselagwe has clearance between them while this step is being completed.
Above: Left side view after servos and control linkages are complete, and the first stage of trimmimg was completed

Above: Right side view; servos are buried within the dual layer area of the wing. The radio receiver is also inset in a pocket so that it is flush with the wing's upper surface. It is covered and retained in it's pocket by ironing on a piece of transparent document laminating film. The antenna was modified into a 'base loaded coil' configuration, so that there is only ~7" of antenna mounted forward along the side of the upper fuselage. A 3S 1000 mAH battery is velcro-mounted temporarily while balance is being adjusted.

Above:

Above:

Above:

Above:

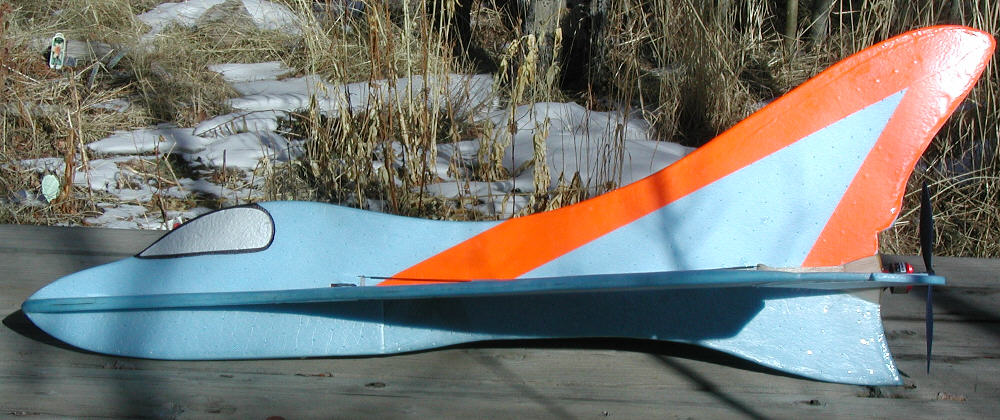
Above: After the first flights, the leading edge was also covered in fluorescent orange tape to increase visibility on low head-on approaches.

Above: A battery compartment was cut out in the foam of the lower fuselage. Iron-on transparent document laminating film was then applied to strengthen the entire area. Once this process was completed, the left side cover was also made from more of the laminating film. Then a right-side cover was cut from a thin piece of clear plastic sheet; it was hinged in place with clear packaging tape, and the closure was also made from more of the clear packaging tape.

Above: To increase visability against the sky while flying, I covered a large area of the upper wing surface behind the forward step layer with deep blue packaging tape.

Above:
(More information and more extensinve photo captions will be added as this design project progresses, and as time allows.)