
At this time, I'm back to flying the Mikuni VM36 Carburetor on the Hirth F33B engine. The narrow tires & wheels which I started with seem to be thinner & more prone to cactus spine induced leakage, but they are lighter weight, so I installed a new set of inner tubes in them and put them back on this trike.


There are aproximately 15 acres of 'lightly groomed' short grass prairie where protruding rocks and some taller ground cover vegetation has been removed. The surface of the central 7 acres is more extensively groomed, offering over 300 yards of good surface in the primary N-S direction from which to take off and land, as well as friendly ground for a variety of ground handling. With an elevation of just a bit under 10,000 feet ASL, the reduced air density and ~30% lower atmospheric air pressure offers it's own challenges for both motors and wings.
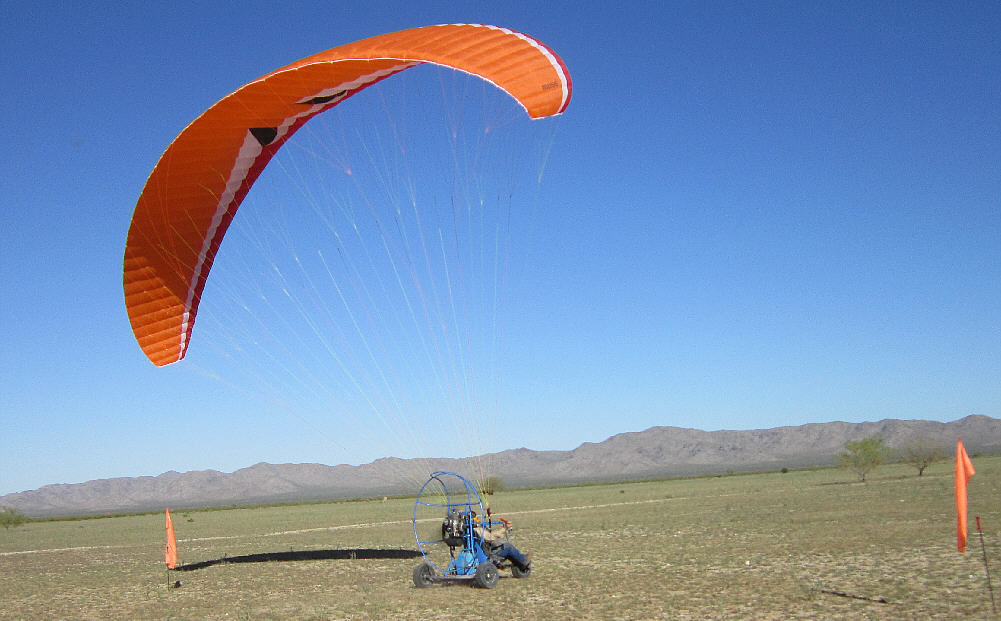
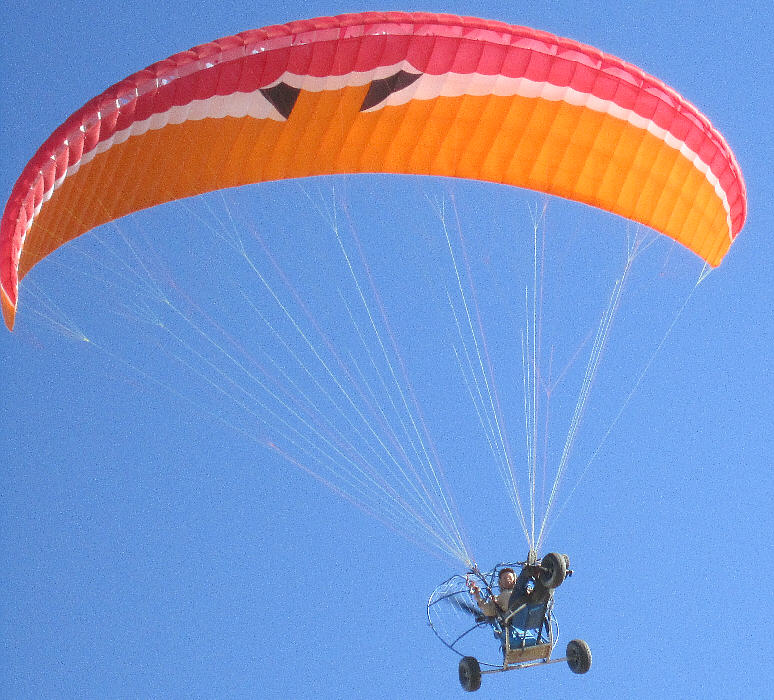
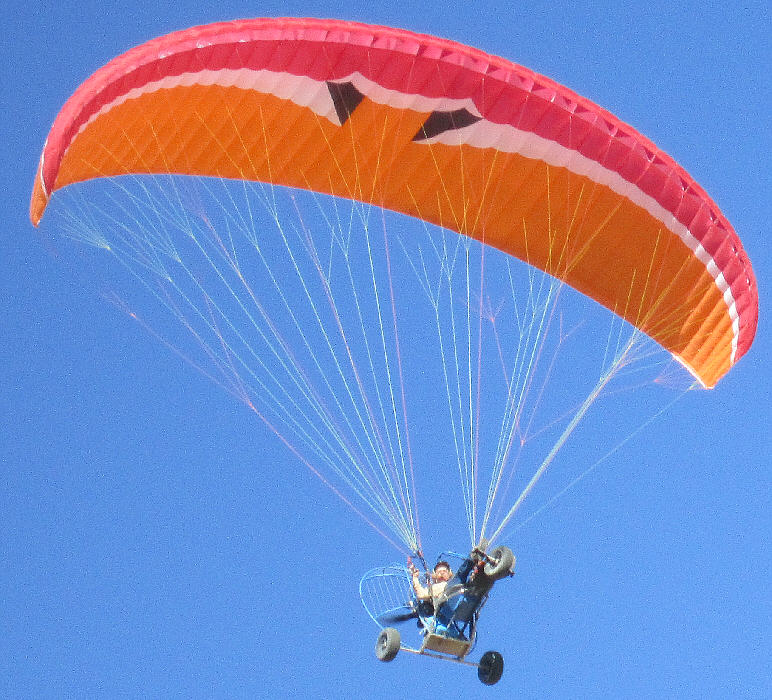
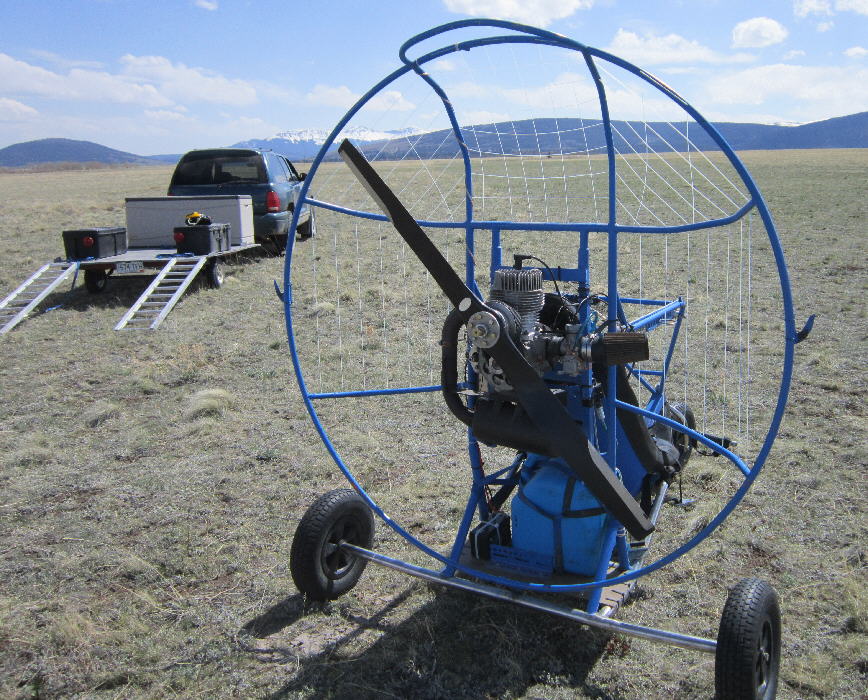
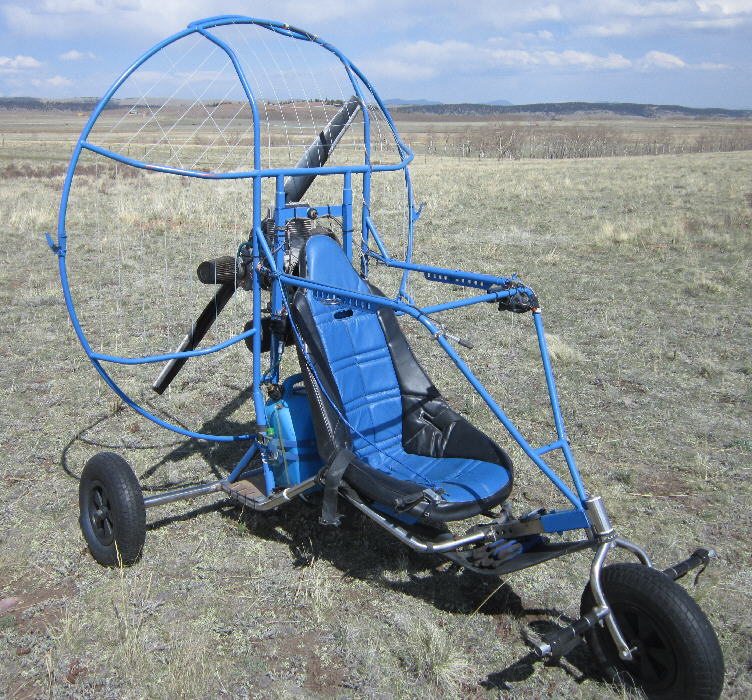
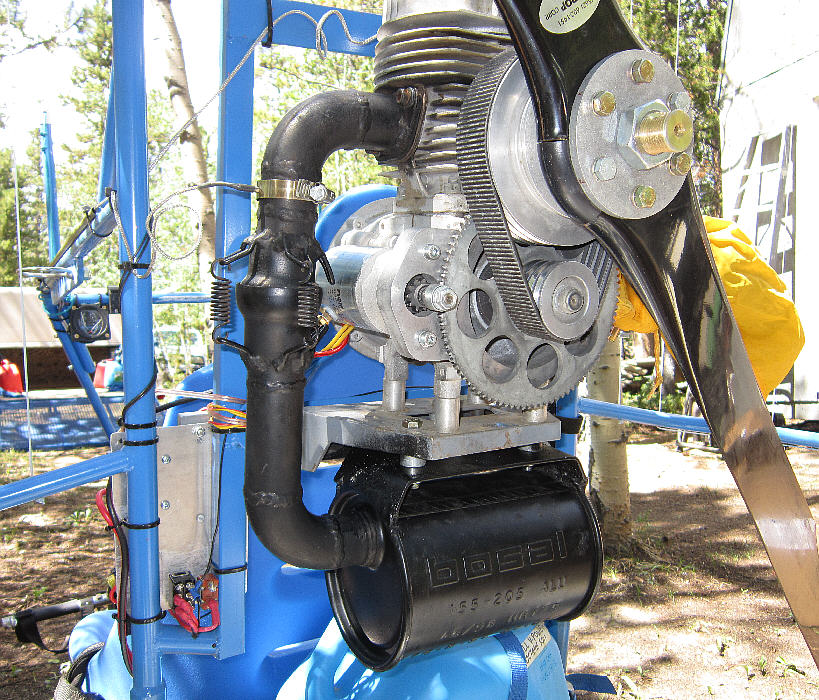
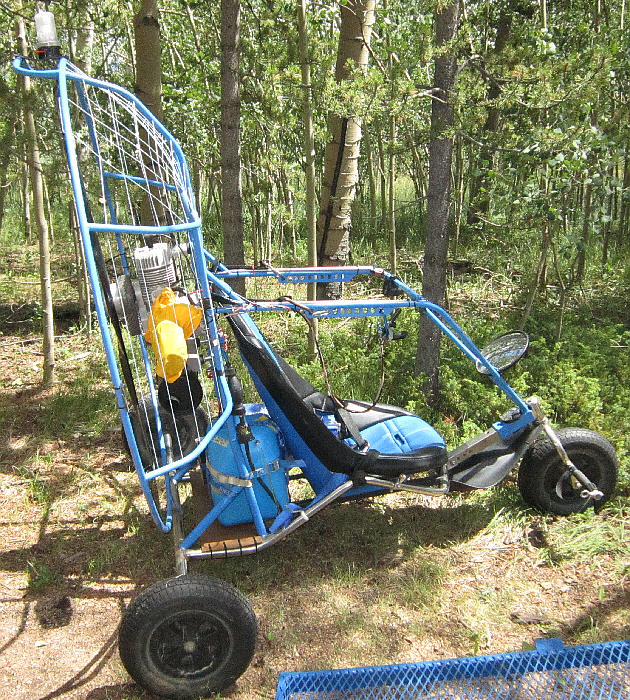
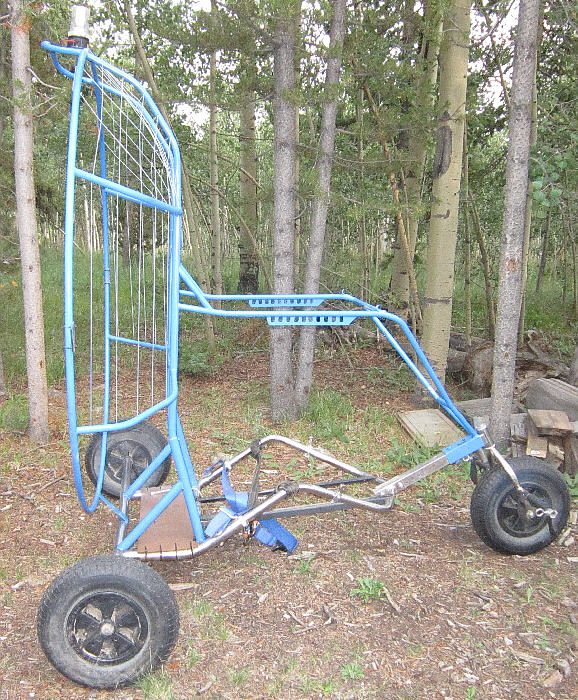
This is a PPG Trike project in continuous evolution. The photos below tell some of the story of this project. I added dual engine temperature instrumentation to allow fine tuning of the carburetor jetting, changed out the original Bing carburetor to a Mikuni & then to a Delorto carburetor, switched back to the Mikuni again, and extensively reworked this ultralight aircraft to suit my own purposes. This is an ongoing project, with slight modifications being implemented on an ongoing basis. The photos below show it on May 25th, 2016 after all of the modifications; (the strobe light is not mounted in these photos.)

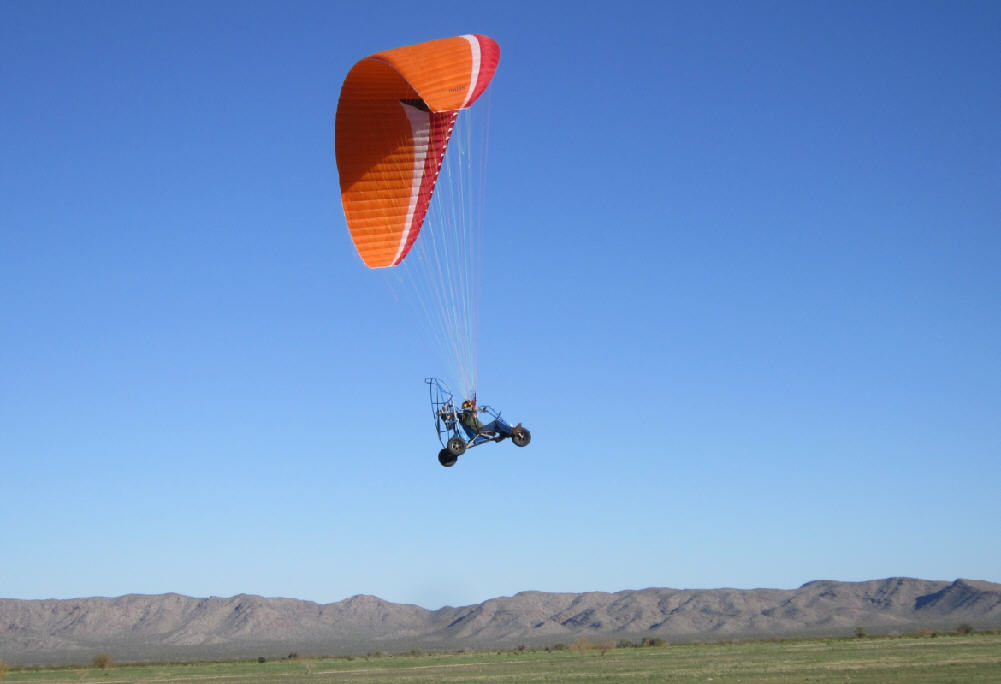
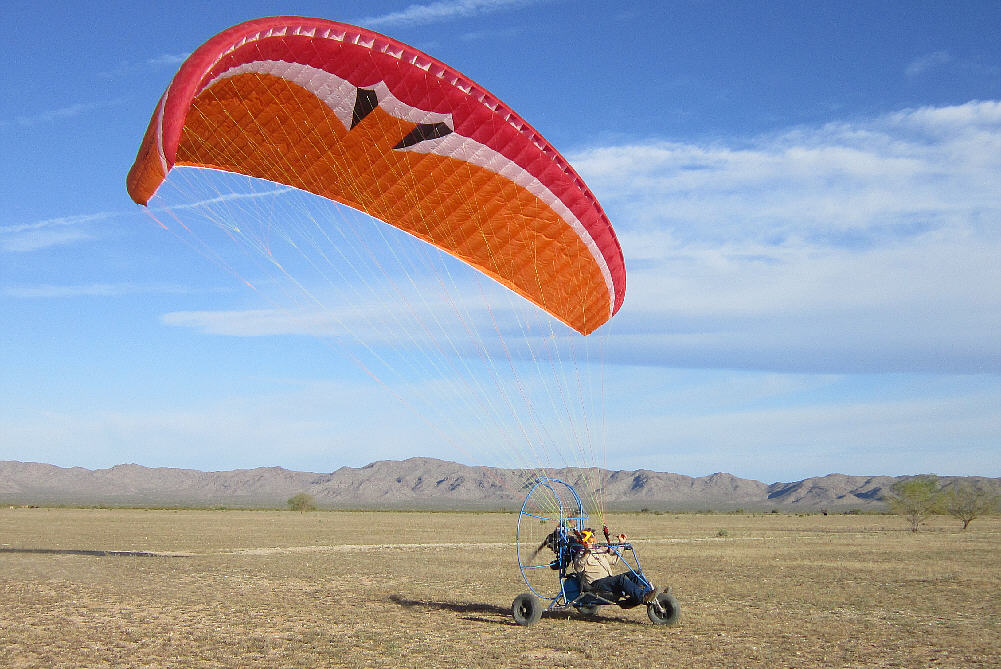
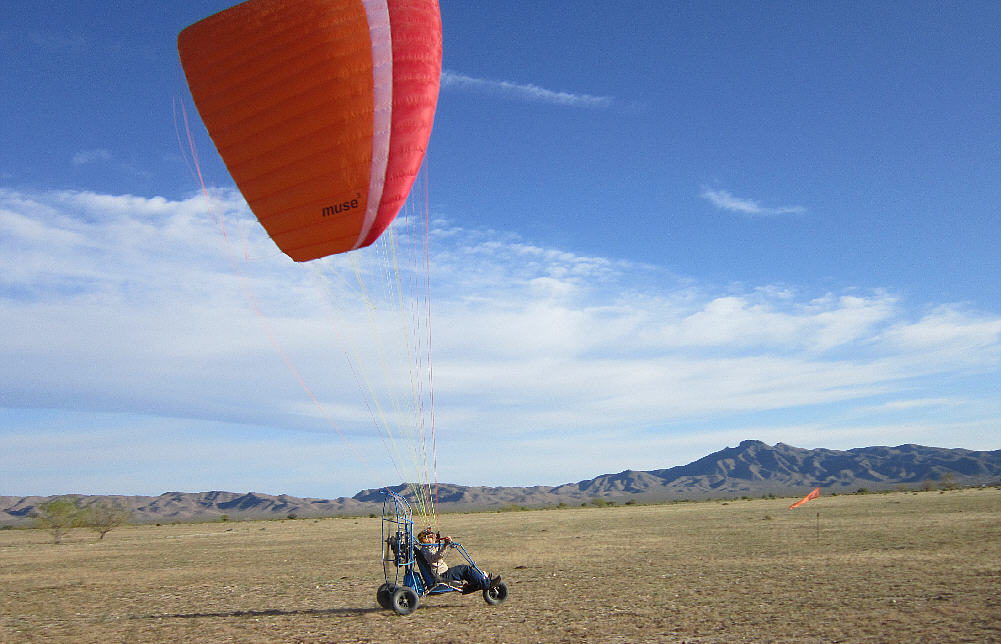
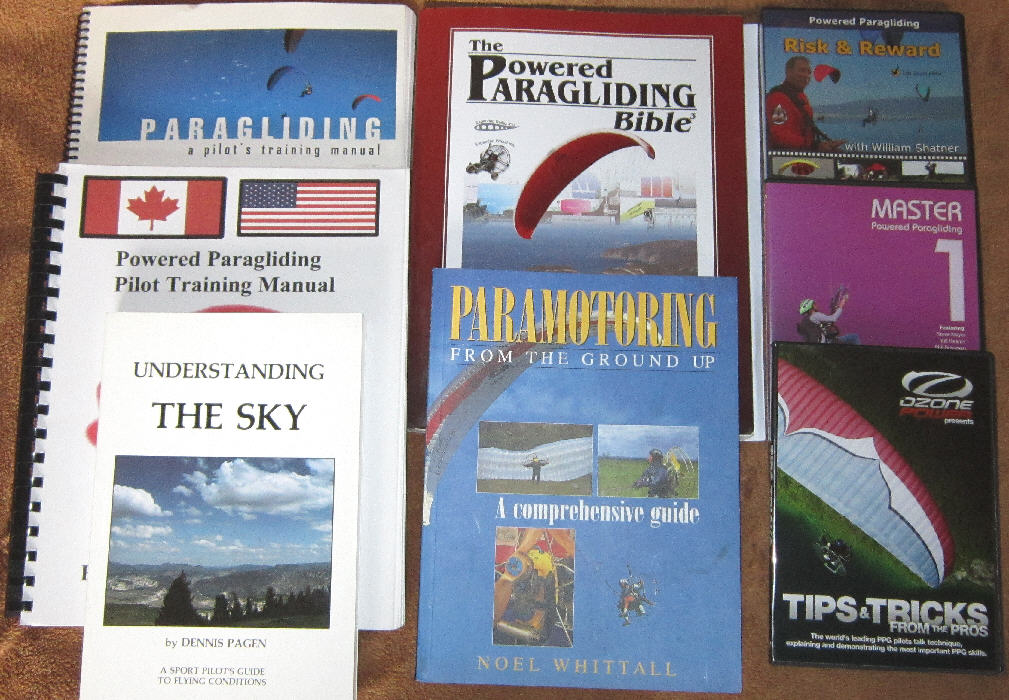
After doing some research, I purchased the 31 square meter XL version of the MacPara Muse 3 Powered paraglider wing/ canopy to fly with this PPG Trike. It has an LTF-EN-A rateing (for both non-powered and powered flight) and very high stability characteristics, easy inflation and launch characteristics, yet is also rated with a glide ratio of 8.3 to 1 (when flown in free-flight mode.) It has a minimum speed of about 15 MPH, and a maximum forward speed of up to 27 MPH when the speed system is engaged. It's built with very adequate sized lines and has a higher load capacity rating (close to 400 pouinds) when flown with a motor system. It is built with a second set of riser suspension points, just above those used for free flight service, provided for use in powered paragliding.
Here's a bit of what MacPara has to say about this Paraglider:
Muse 3: Relaxed Sport
The Muse 3 has been designed with impressive flying characteristics that will surprise the eager intermediate pilot fresh out of training. The Muse 3 is in its own class called relaxed sport because of its fun handling and performance usually found in more advanced paragliders. You will love how easy it does everything well in a calm yet sporty feel. Critics say it�s so easy to fly it practically fly�s itself! It offers incredible safety and stability that is really fun to fly. This allows pilots to fly more often without the worry of feeling like their flight may be jeopardy. Safety and performance matched together makes this a popular choice for pilots who take a causal approach to flying on weekends. The Muse 3 is certified in the LTF/EN-A glider category. The Muse 3 is simple to control on the ground and in the air. You will feel like a pro with its exceptional take off characteristics to get you flying right after inflation with no hassles. It will stay above your head without the tendency to collapse or wander off course. The safety in the Muse 3 is best admired by pilots that are looking for a paraglider resistant to collapse."
"Intensive testing resulted in a well balanced glider with simple take-off characteristics and easy behavior during extreme maneuvers. The canopy is very resistant to collapse keeping your flight on track. In the event of a collapse the opening is smooth and fast. In an induced collapse the glider gives a rotation of only 30 degrees. The canopy of the Muse 3 is well damped in all axes but offers lively sporty handling to keep you smiling!
Effortless Handling and Well Designed
The light brake pressure allows pleasant turns during long thermal flights and increases progressively towards the end to offer a good safety margin. It has a large brake range offering good pilot input to know how the glider is flying above you. The Muse 3 is 4 liner paraglider with a 5 point riser system and split �A� risers for easy big-ears which is usually only found on higher performance gliders. The risers have 2 suspension points giving the option of free flying or paramotoring. This is a nice option for pilots that don�t want to buy two paragliders. More and more pilots are realizing the Muse 3 does it all well! The transition from free flight to powered flight is very simple: hook up the carabineers in the second position and off you go with shortened riser length for powered flight! There is no need to extend the brake lines.
Paragliding or Paramotoring � Certified to keep you safe
Regardless if you are using the Muse 3 for paragliding or paramotoring it has been certified to fly perfectly in thermals and cruise like a soaring eagle. The Muse 3 is designed for pilots that want the most out of their flight without the headache and stress of waiting for �things� to go wrong in turbulence or powerful thermals. Undoubtedly, the Muse 3 lets you fly with ease."

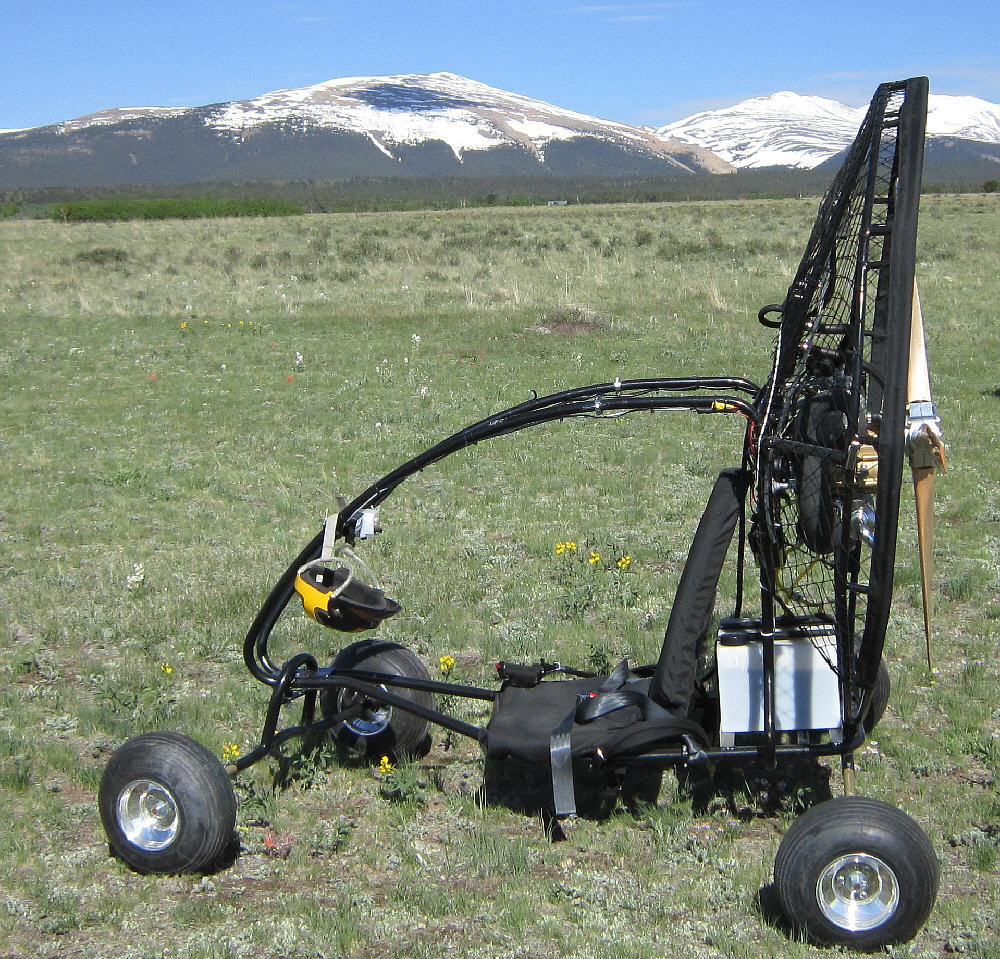
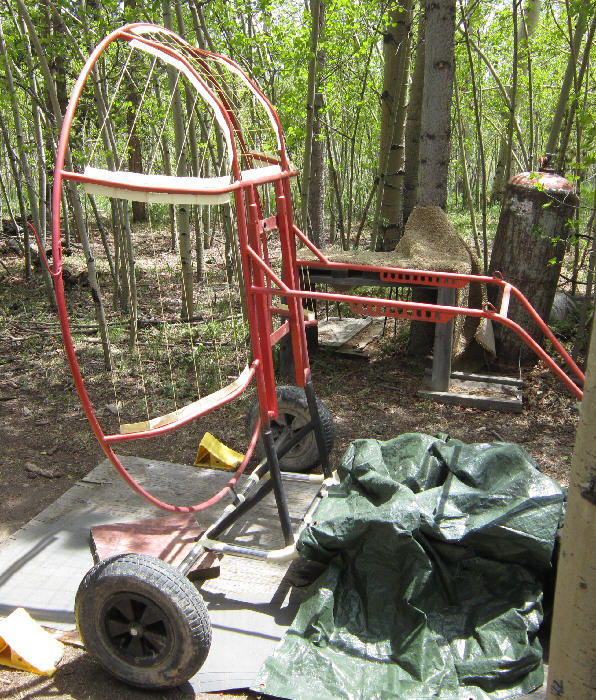
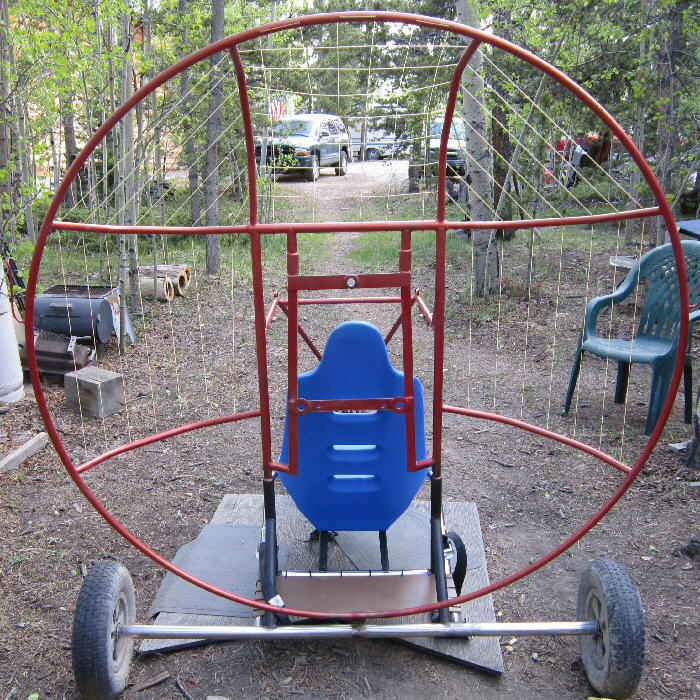
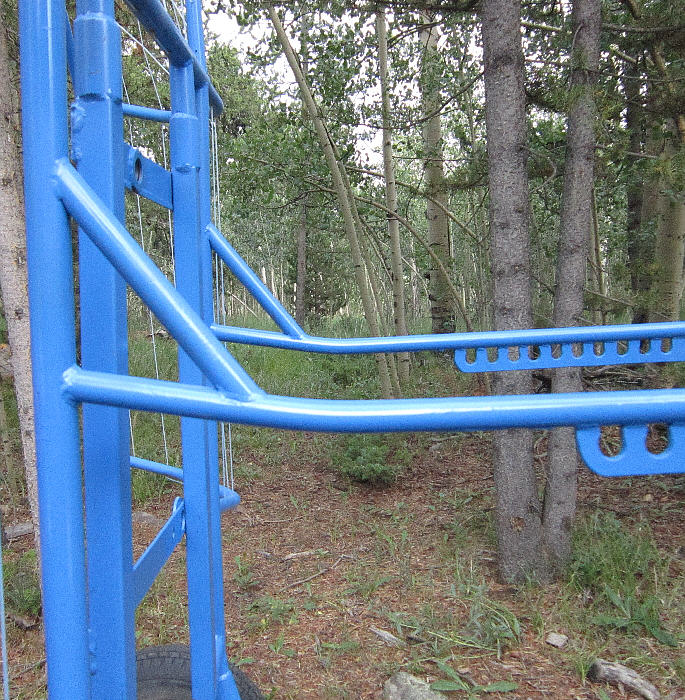
The Trike's under-carriage is a Flexifoil Trike Buggy with the stainless steel main frame. The steel tube propeller cage is 60" inside diameter allowing the use of more efficient larger diameter propellers. The motor mount frame was built out to mount the HIRTH F33. The rear axle has a fairly wide stance at 60", and the wheels are 15" diameter x ~4" wide for good ground clearance and good stability. It had a 10 gallon capacity tank seat when I bought it, which is not legal for FAR103 ultralight operations; that had to go. It also had a radically undersized prop mounted, unsuitable for running on this 313cc HIRTH F33B engine.
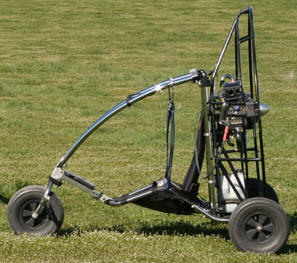
The photos below are of the latest version of the 'Trike Buggy Bullet" PPG Trike which is similar to this build. This model can be purchased from www.trikebuggy.com
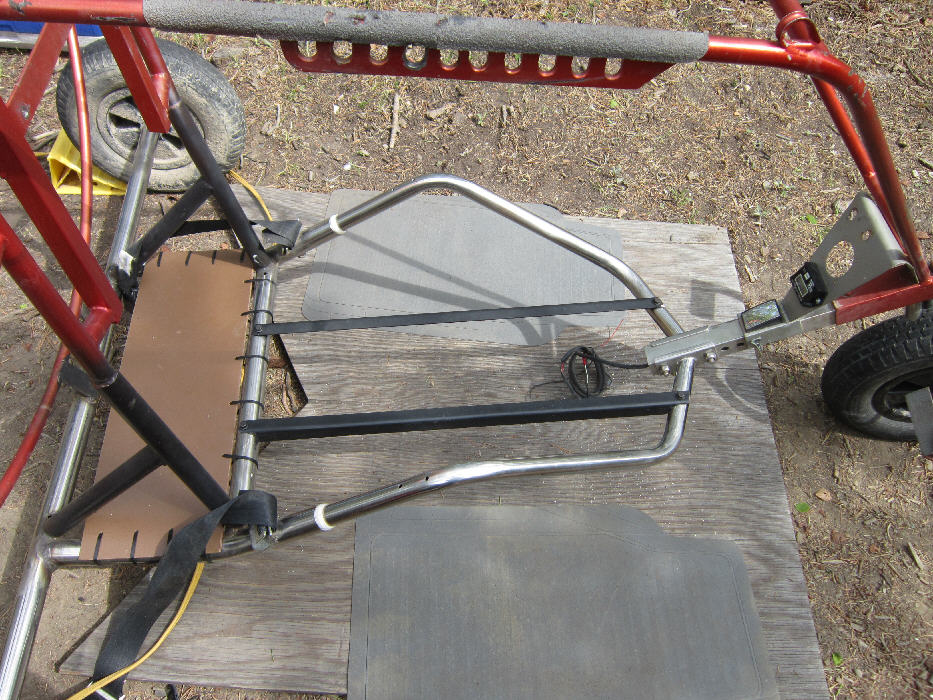
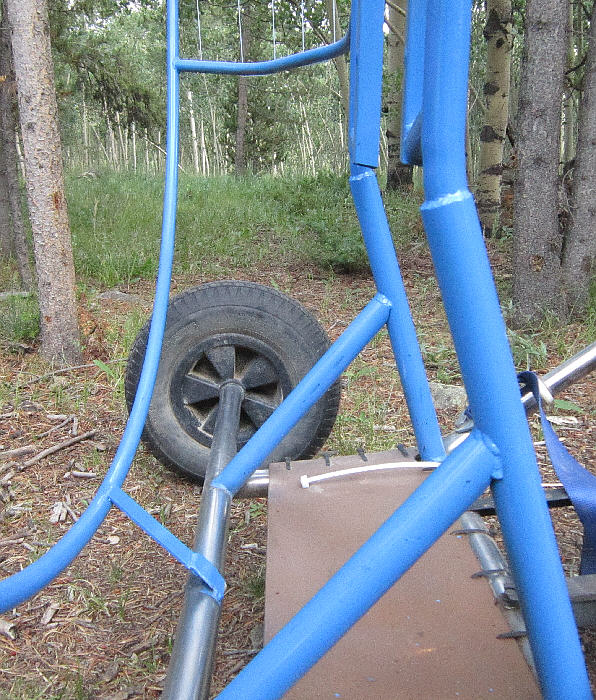
A panel was cut & mounted to the rear lower frame (secured in place with a lot of heavy duty cable ties) to support the new fuel tank and Gel Cell battery for the starting & electrical system. This panel's final position is farther forward from what is shown in this early photo, with it's forward edge supported by the frame cross-tube.
The motor mounting system was also optimized to precisely align the 56" diameter propeller with the rear face of the 60" diameter propeller guard cage.
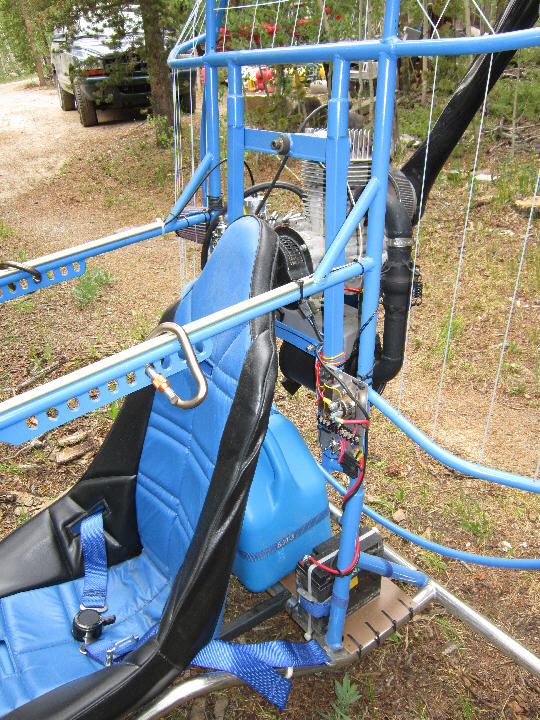
The 12 volt Gel Cell battery can be seen mounted below; this battery is the type used in automotive jump start packs, rated for handling starting current loads of several hundred amps. (Later, a lighter & more compact AGM battery from a Schumacher 400A jump starter unit was installed.)
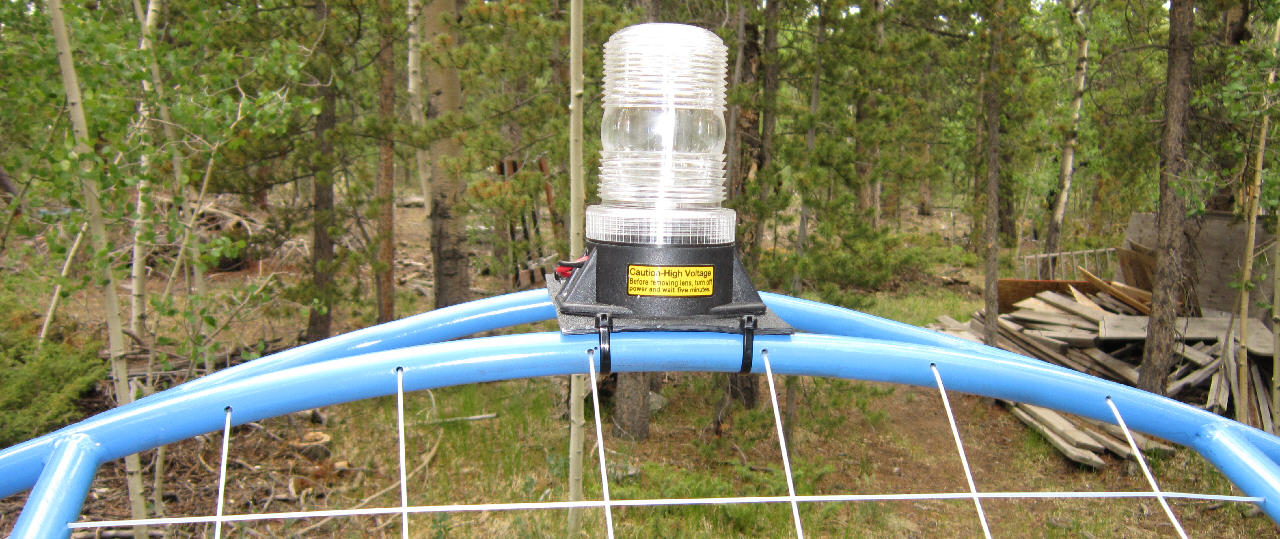
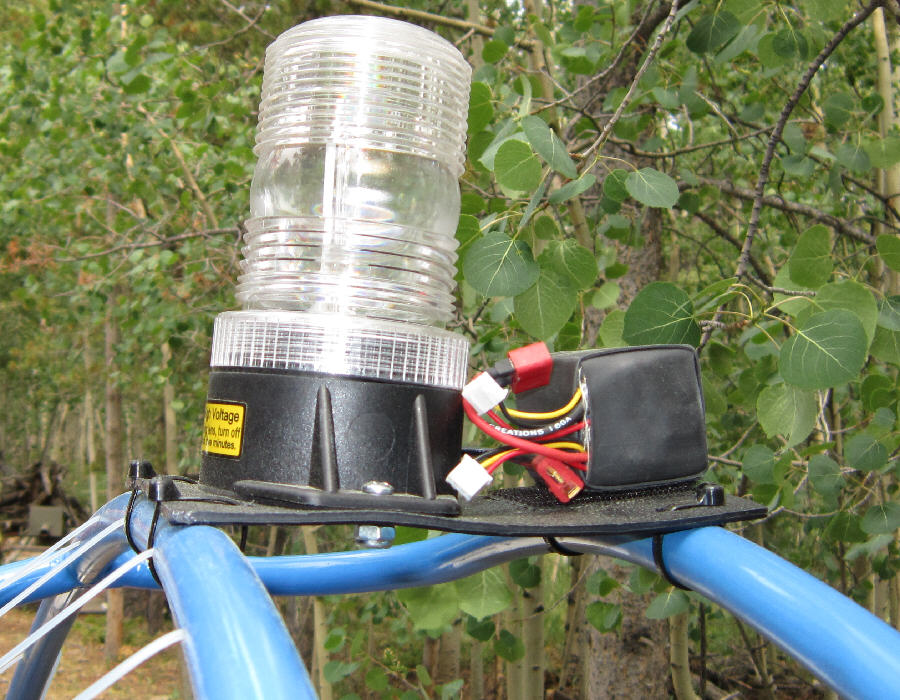
This strobe, with well over three mile visibility, is an efficient circuitry design that only requires 300 mA operating current. (I bought it from www.BlueskyPPG.com ) Rather than running wires along the propeller cage frame, this unit is being powered by a 4 cell 1250 mAH lithium ion battery pack which mounts with industrial strength velcro just aft of the strobe. That gives about four hours of strobe operation on one battery charge. I have three of the strobe power battery packs which I built up for this application at this time. By limiting the strobe's wiring to a very few inches, possible radio interference should also be minimized.

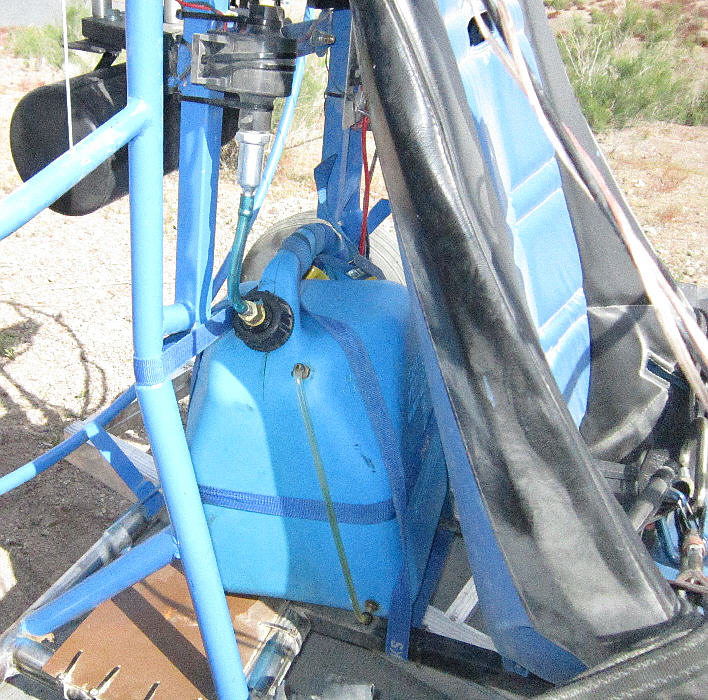
I had initially used the yellow transparent 1/4" I.D. Tygon fuel tubing so that I could see the fuel flow through these fuel lines, but the line inside the fuel tank developed a hole just at the lower end of the brass pass-through fitting at the top of the tank after only ~3 hours of engine run time, allowing air to enter the fuel line. This messed with the fuel mixture to an extensive degree! The vibration generated by the single cylinder F33 engine, induced into the entire airframe is the likely cause of this failure of the Tygon fuel line.
I replaced the in-tank pickup tubing and other fuel line sections with blue 1/4" I.D. Tygon fuel line. It seems to be a better grade of tubing than the Yellow line which I had tried previously.
CARBURETUR SETUP TECH DETAILS & NOTES
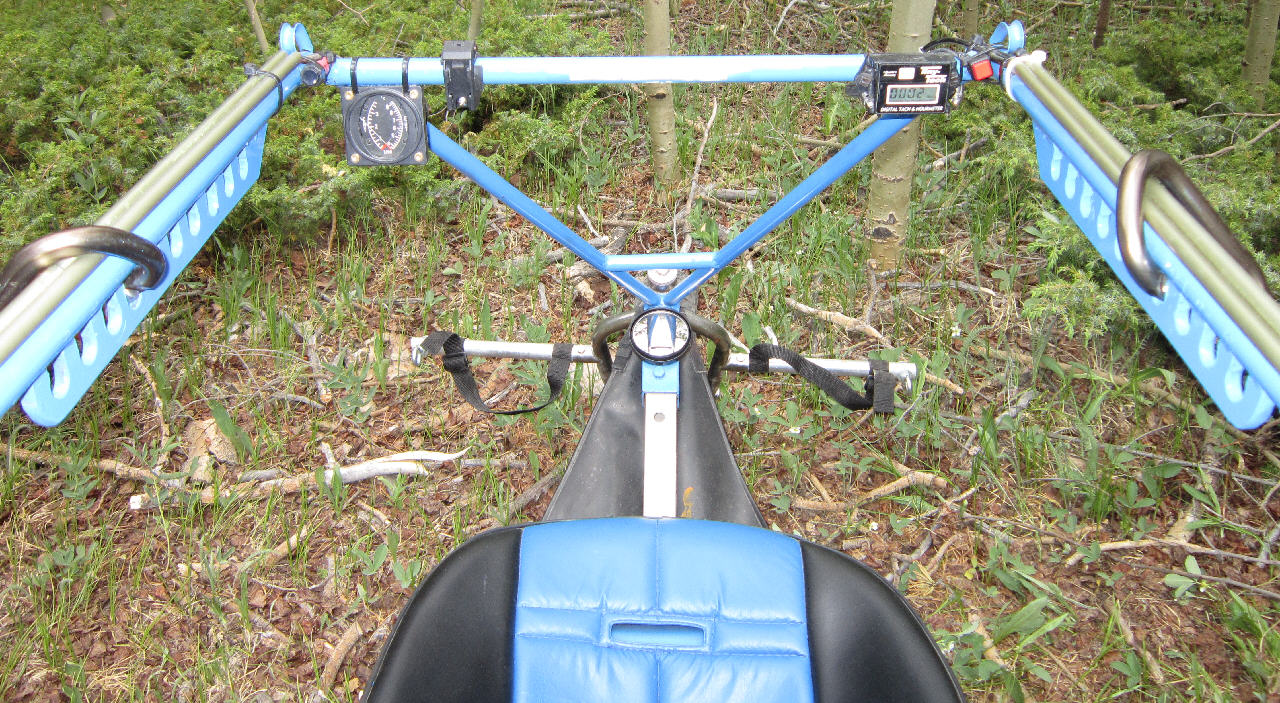
My flying environment is a bit more challenging for the motor & carburetor setup since I'm based at a flying site at 10,000 feet ASL. Having the Falcon dual engine temperature gauge (CHT & EGT) is essential to insure that the full throttle operation is staying comfortably within the desired temperature ranges.
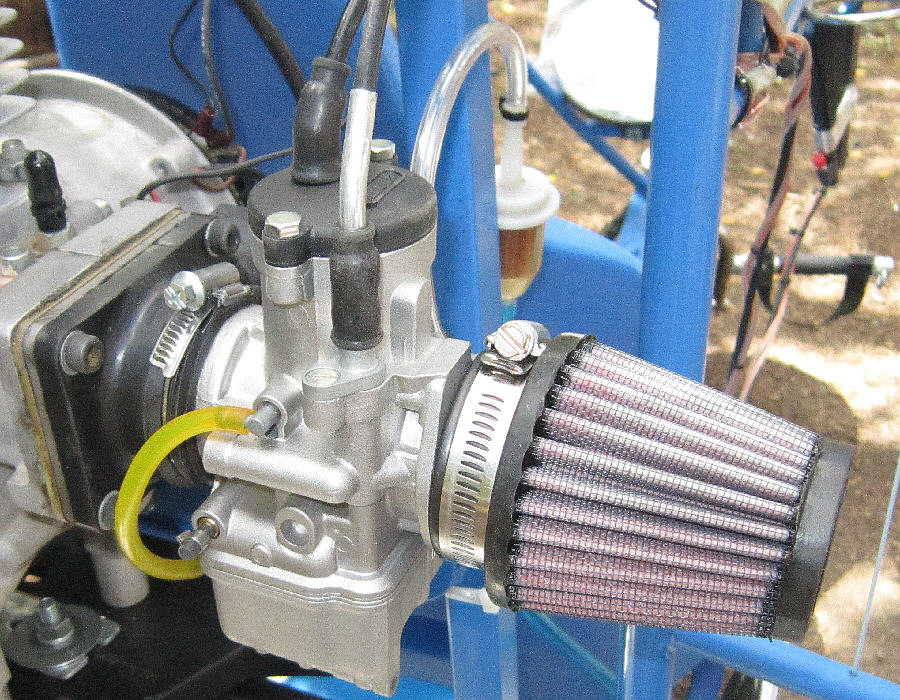
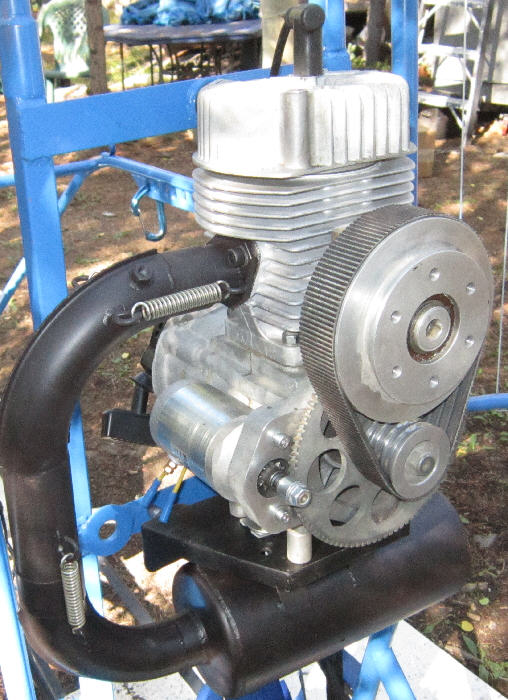
After installing the newer generation cylinder with it's improved porting and installing the new HIRTH exhaust system, I'm finding that I need to run a 350 main jet in the Mikuni VM36 carburetor to keep the EGT & CHT within the desired operatin temperature ranges. I now have the jet needle in the top of the five available clip positions at this time, for a leaner run in the upper mid-range of the throttle opening.. I'm using a 50 pilot jet at this time.
The setting of the low end air adjust / boost circuit adjustment screw is critical, as it provides not only air, but also added fuel into the carburetor throat as the throttle slide just begins to be opened by the hand throttle.
[MAY 26th, 2016 Update:] As I'm set up now with the peak RPM set at about 6150 RPM running on the ground; I've increased the pitch on the Ivoprop a couple of times while getting the Mikuni carburetor tuned. Measured at 75% of prop blade span, the prop pitch is set to 14.5 degrees referenced to the prop hub.
After warm-up to full throttle, the idle drops back reliably to 1500 RPM; the cool startup RPM is at about 1300 to 1400 RPM. I use the choke for initial start, then close it soon after starting.
There are three drain-out lines on this VM36 carburetor; one on the bottom of the float bowl, and two coming out either side up higher on the carb body. Due to the vibration of the enging on a PPG installation, there is a tendency for fuel to be 'dribbled' out of the lower overflow drainout tube at certain lower RPMs where the vibration causes fuel to be sloshed to the location of theis lower drainout tube's upper end. Through experimentation, I found that the carburetor will operate most reliably with this lower drainout tube routed to return overflow fuel back in to the main fuel tank. That eliminates the dribbling of the sloshing fuel from that lower vent line without affecting the carburetor's operation at all - it still also has dual upper vents / drainout lines.
[Above:] The Dellorto PHBE 34 BD 34mm throat carburetor is the one recommended by the U.S. Hirth importer / distributor. I have more recently been testing with one of these carburetors, trying different main and pilot jets to get the bet performance from this upgrade Hirth F33B engine.
A cable actuated choke has been installed in place of the lever actuated one which originally came on the carburetor.
UPDATE: On my Dellorto carb setup, I have been flying with a 180 main Jet at 1800 feet elevation, and a 170 jet at 5200 feet elevation. A 160 to 165 main jet seems most suitable for flying at ~10,000 feet.
The Mikuni VM36 carb may allow the Hirth F33 engine to 'breathe' better than the Dellorto; but it may use more fuel in the process. I seem to be able to get good top end RPM with somewhat lower top end EGT temperatures when test running the Mikuni carb. But most cruising flight is done at around 4000 RPM. At 4200, this trike/ wing combo climbs gradually, whila at 3800 RPM it decends very gradually. So getting the main jet selected for the right mixture is the first step; setting the jet needle clip position for optimum EGT readings in the upper mid range is the second step of the carb tuning process.
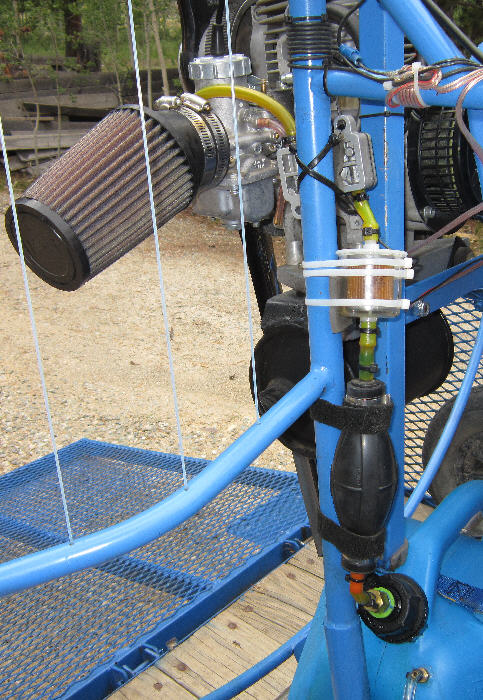
[Above:] I use a low pressure electric fuel pump which I've installed on the Bluehawk. It is controlled by a separate switch on the electrical control panel. This provides consistent fuel level in the carboretor throughout the entire operating RPM range. (My impression was that the vacuum pulse driven fuel pump does not provide adequate fuel flow volume on the F33 engine at 6100 to 6200 RPM; this results in a leaner run at peak RPM. With the electric fuel pump, this is not an issue.
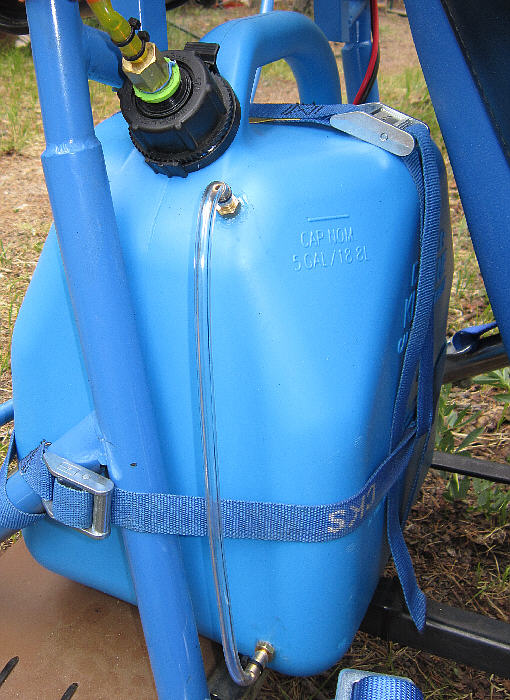
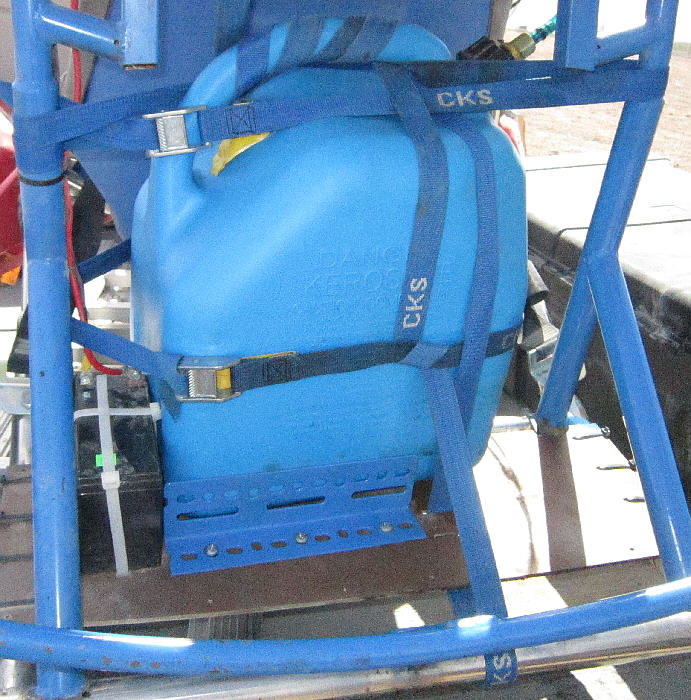
[Above:] The 5 gallon Scepter fuel tank is fitted with a clear 'fuel level view tube' to allow for easily checking the fuel level. Holes were drilled and tapped for the 1/8" NPT fittings and the threads were sealed during installation with 'Plumber's Goop' which is a flexible sealant with good adhesion qualities for this application. I used clear vinyl tubing for the vsight tube. It's easy to see the fuel level in this tube at a glance. Pep Boys carries these Scepter brand gas cans; they are made from a tough material. The part which seals off the dispensing spout when it is enclosed within the fuel tank can be modified by cutting away excess plastic, then drilling the center for male / female brass fittings. The black flange gasket can be removed from the filler nozzle and installed around that modified 'cap' so that it seals there.
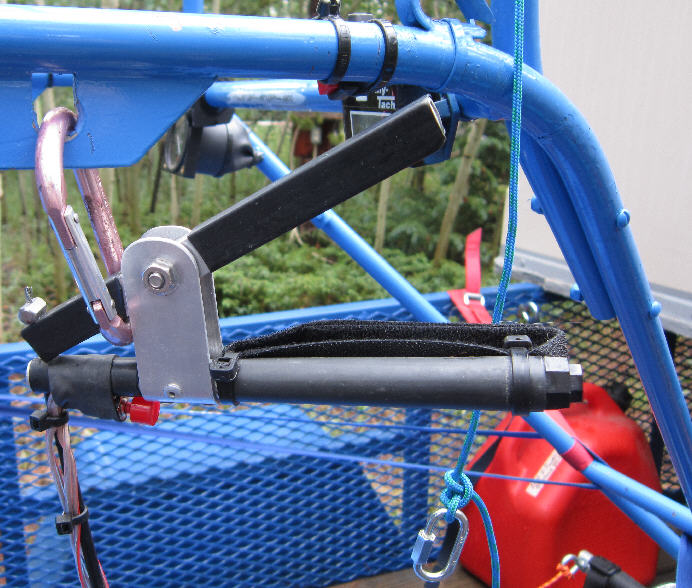
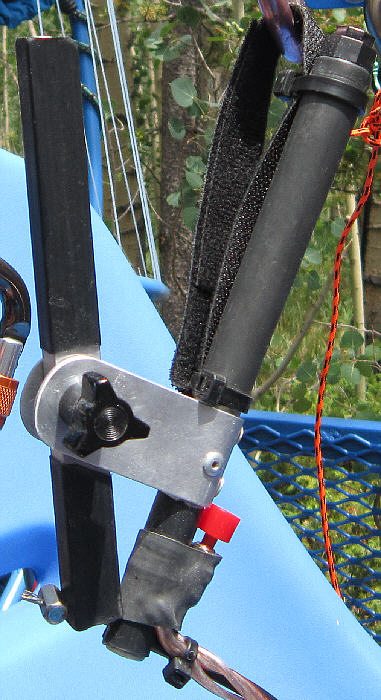
An engine start switch is lashed in place for thumb activation with Kevlar thread before the wiring & final layer of heat shrink were installed. (A new guarded switch has been used to replace the one shown in this photo. I later moved it from the hand throttle and mounted it on the upper hang rail, as it was akward to use on the hand throttle. ) The kill switch is mounted in the end of the handle where it's easily thumb-activated. There is also a second redundant kill switch mounted on the upper right frame, usable in the event that the handle-mounted kill switch should fail.
UPDATE NOTE: With the high current on the Hirth's starting and ingition circuits, I've seen two switches develop problems & fail due to internal contact arcing- first on the kill switch on the hand throttle, and then later on the start switch which I had mounted on the hand throttle. I now have the frame-mounted start switch and redundant kill switches (two) in addition to the master kill switch on the electronics control panel. These redundant push-button switches can all be easily reached while belted into the pilot's seat, as well as when doing any test running of the systems.
This all aluminum assembly (below) with the heat shrink covering and switches installed (without the cable & kill switch wiring) weighs only 2-3/4 ounces. The throttle lever pivots freely; the strong slide return spring within the carburetor will allow the engine to drop to idle reliably when the throttle lever is released. A Velcro adjustable hand strap was also added to this assembly before it was installed on the Bluehawk PPG trike.
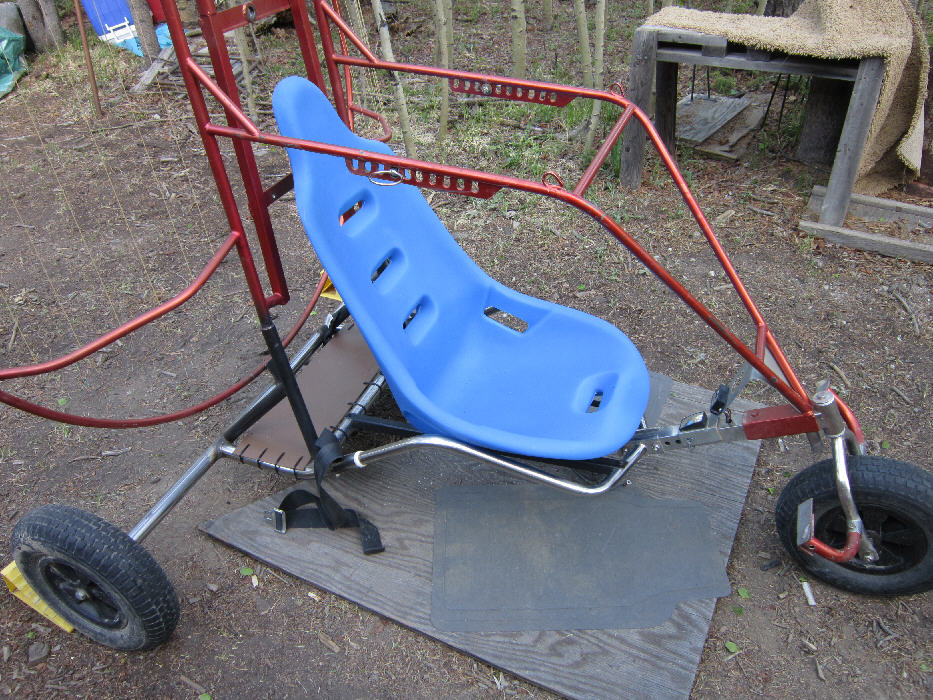
After all of these modifications & upgrades, the 'Bluehawk' Trike weighs in at ~200 pounds with the fuel tank empty. (With the later upgrade to the larger tires & the change to a lighter starting battery, , the weight increased to around 210#)

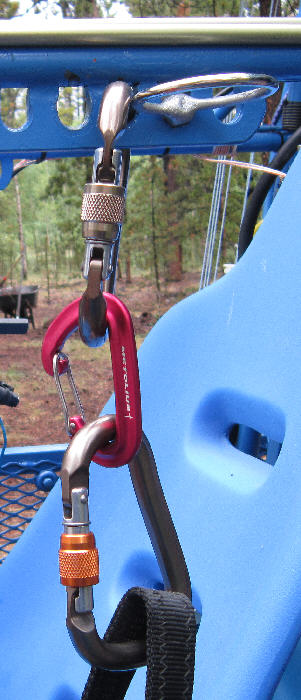
Using 6000 pound rated 1" webbing material from REI, I made up my low hang point loops. The MUSE 3 specifies a distance from the seat to the hook-in carabiners of about 15", so I made up some double layer loops that have a ~3" section where there are three layers of webbing. These were then sewn with #69 bonded polyester thread. Two complete passes with a zig-zag stitch patern run the full lengths of each of the matching loops, and run along the outer edges of the webbing. In the three layer overlap area, additional stitching (non-zigzag) run back and forth from edge to edge throughout the entire overlap area.


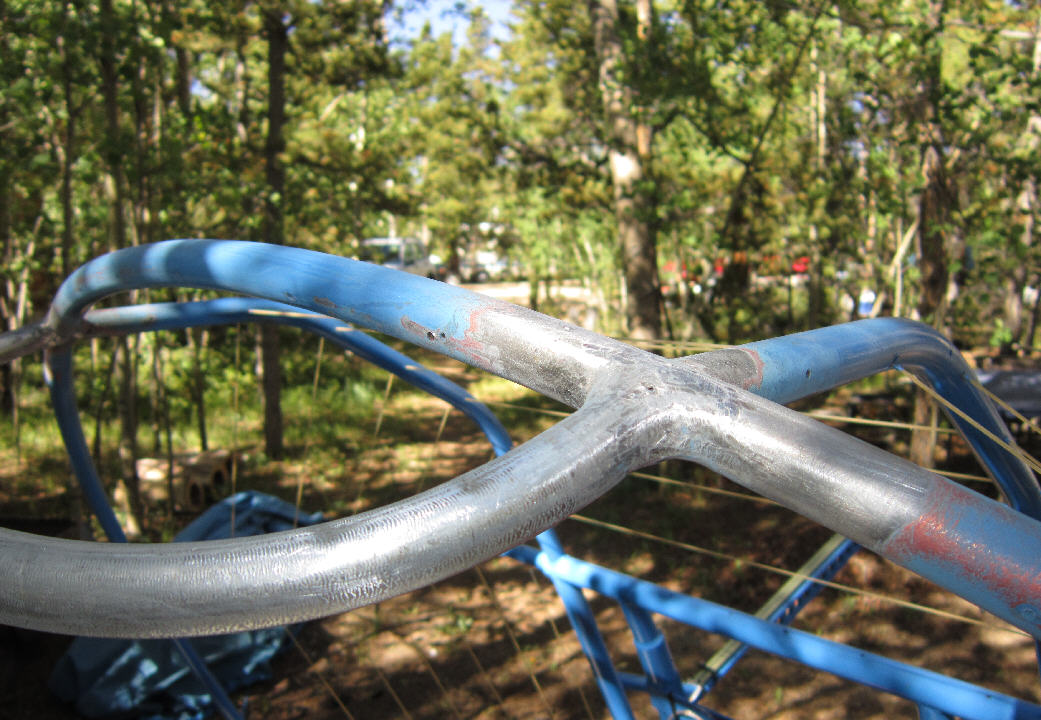
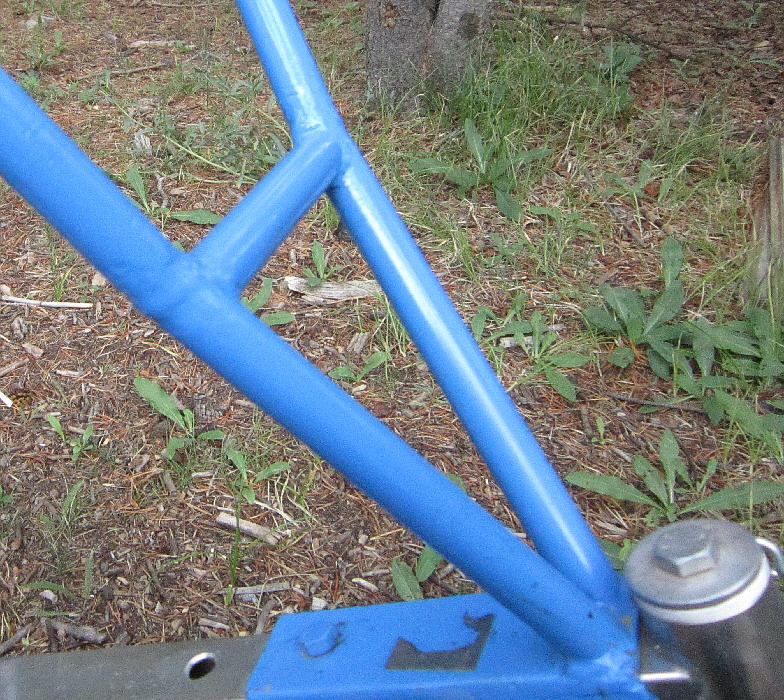
To remedy this, the entire engine installation and seat were removed from the frame. Then the support at the bottom center of the prop cage was cut, and the forward extensions of the hang rail frame were cut at a point ~2" above the front lower cross brace tube.
Next, the upright motor mount supports were both slowly and progressively heated at the same time with an acetylene torch by an assistant while I kept pressure on the forward hang rail frame until the heat level was adequate to allow the 4130 chrome moly steel to bend in the heated areas evenly. A digital angle meter was used to check the change in angle.
After these primary bends were complete, the prop cage / motor mount structure is set with a thrust angle of ~4.5 degrees above horizontal. (The recommendation is for from 3 to 5 degrees of thrust angle above horizontal.) On startup, this directs the prop blast above the laid out paraglider wing until the pilot is ready to throttle up inflate the wing and start the takeoff run. This will also allow working with a higher idle speed RPM, which is better for the Hirth F33 engine.
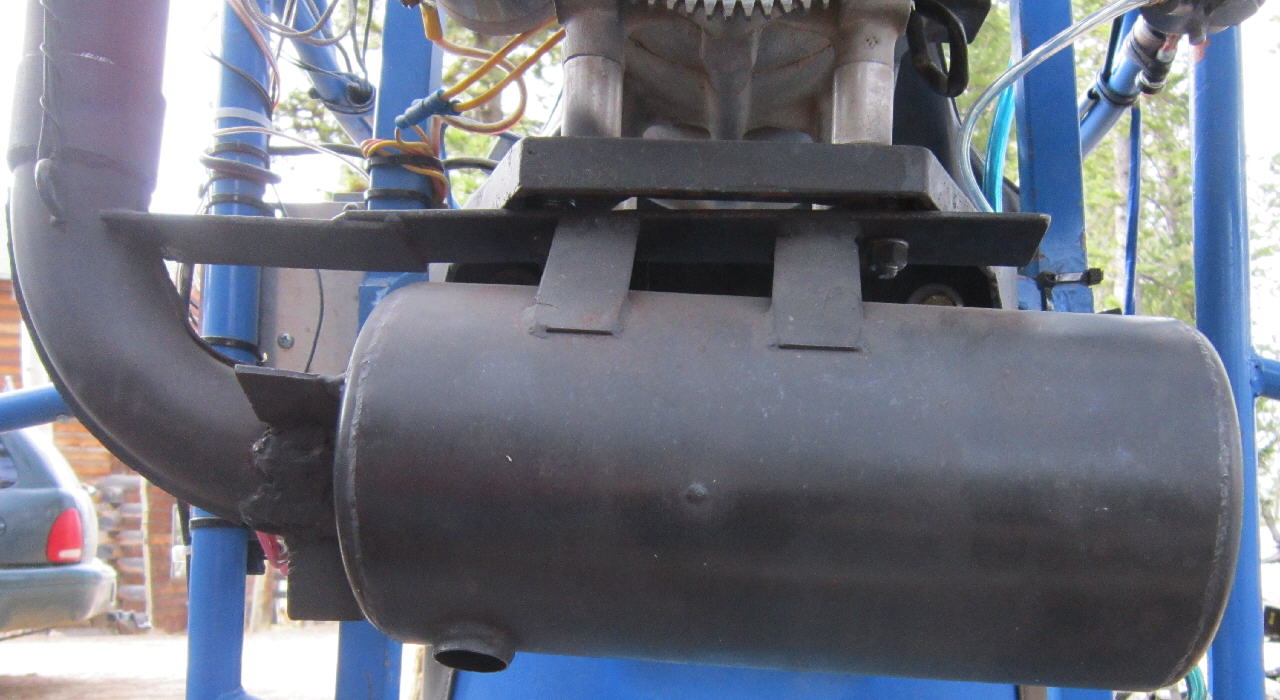
TECH NOTE: This newer style of Hirth F33 exhaust developed a lot of cracks and breaks during the first 5 hours of flight. I had welding done on it and reinforcing metal added in stages to it in two major areas to make it strong enough to hold up in flight. The two thin mounting brakets broke away, and the weld from the inlet tube into the main muffler body failed. The full length cross-plate bracket was added, as were the tube to muffler body braces in three places; the original thin mounting brackets had to be totally replaced with wider stronger material. While this beefing up work might have been accomplished more 'elegantly', the idea was to get it back together to fly! This works.

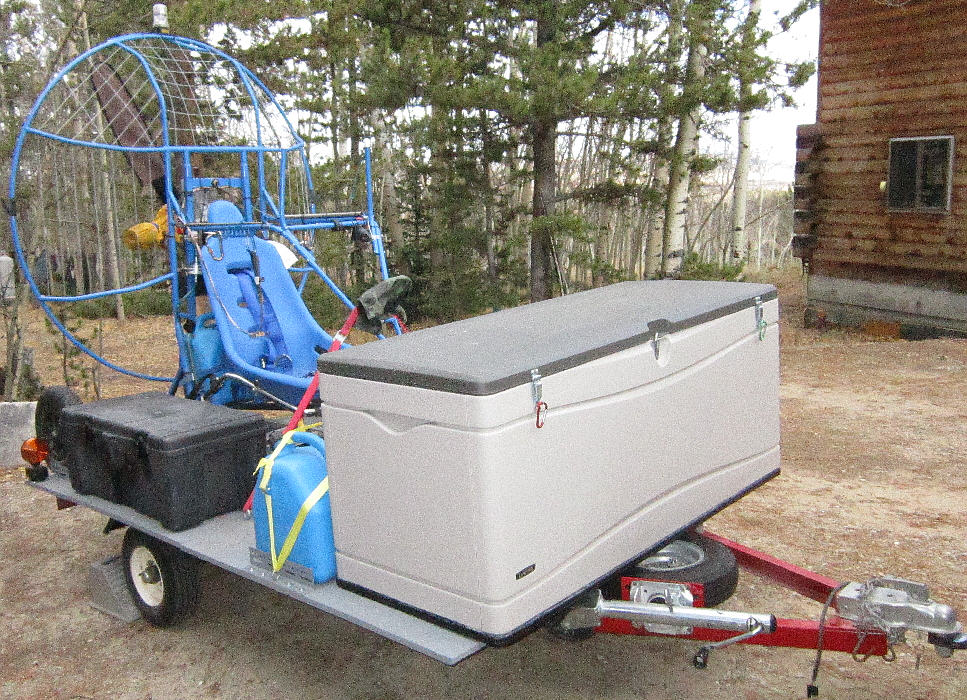
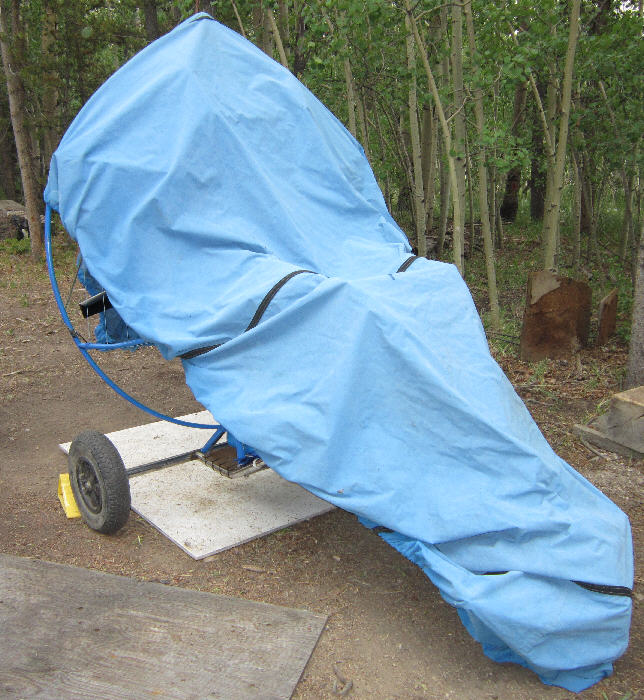
Another nice aspect of the large front gear box is that it protects the Bluehawk PPG trike from flying road debris that might be tossed up by the rear tires while this trailer is being towed. The added buckle latches on the gear box's cover seal the cover very well, and prevent it from being able to be accidentily opened by high speed wind gusts while traveling at highway speeds. the rear tires and their fenders are under the rear section of the trailer deck, so they also can not toss pebbles & road debris onto the trailer deck.
The trailer tongue jack swings / pivots to lock easily into place when needed to make hooking up, unhitching, and moving the trailer quite easy. Tail lights for the trailer are mounted on top of the trailer deck on the rear ends of the gear boxes inboard of the trike's wheels, where they are both visible and less likely to be damaged; they are nicely out of the way while loading & unloading the trike.
FURTHER TRIKE TRAILER DETAILS:
I spent some time doing modifications to a kit trailer, removing the previous deck plywood, then making the changes I wanted.- primarily drilling & bolting; outside of mounting the swing mount tongue jack on mine by welding on a mounting plate to the frame, no other welding was done on mine. That task was also done by a previous owner, but the welding was failing & needed to be re-done.
This type of trailer comes as a kit in a 156# box, ready to be assembled. The trailer frame is very similar to the one Harbor Freight offers, sometimes on sale for $279.99 :
The rear frame on my trailer was shortened by a previous owner by close to 2 feet; the idea is to have the center of gravity of the trailer's load in front of the trailer axle, so the trailer is stable while being towed down the road- if the load is tail heavy, it'll be prone to fish-tailing.
I used two 68" x 48" sections of 3/4" exterior grade (CDX ?) plywood for the deck; a wider rear deck might be used for a trike with a very wide rear axle or larger prop cage- like the Green Eagle or Falcon 4 stroke motored trikes, for instance. I added a longer angle iron rear cross member to my trailer frame to support the trike rear axle & motor weight- most of the weight of the trike is resting on that rear axle.
Getting the trailer total load weight far enough forward / axle far enough back is still the trick; moving the spring / axle assembly farther to the rear on the frame is the best trick- it involves drilling some now large holes in the right places on the deck frame to bolt the spring / axle assembly in the right place under the trailer deck frame.
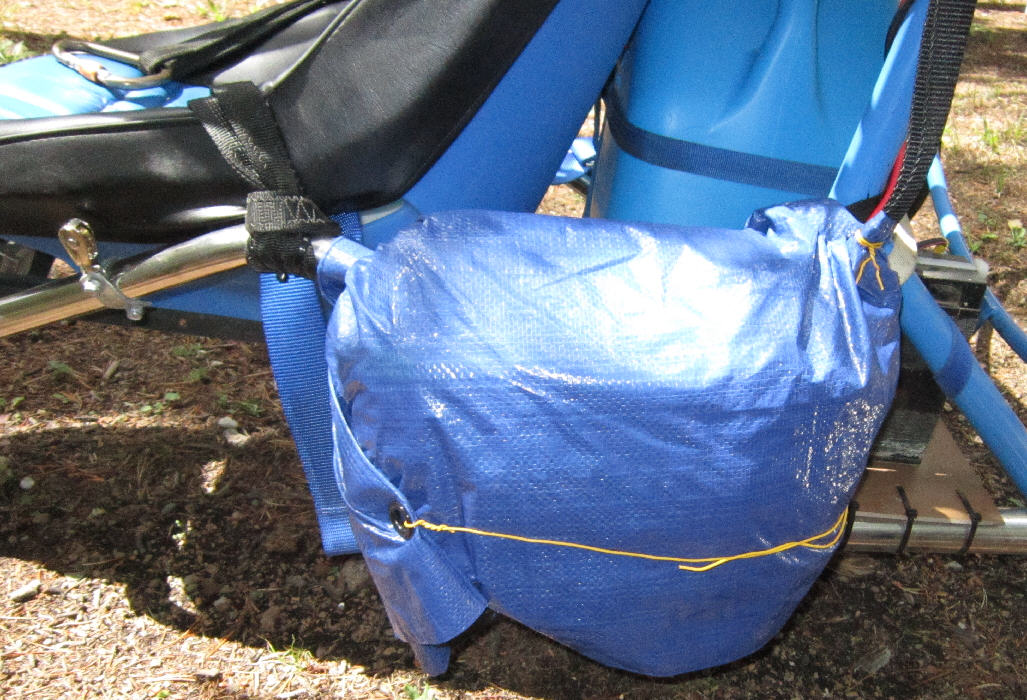
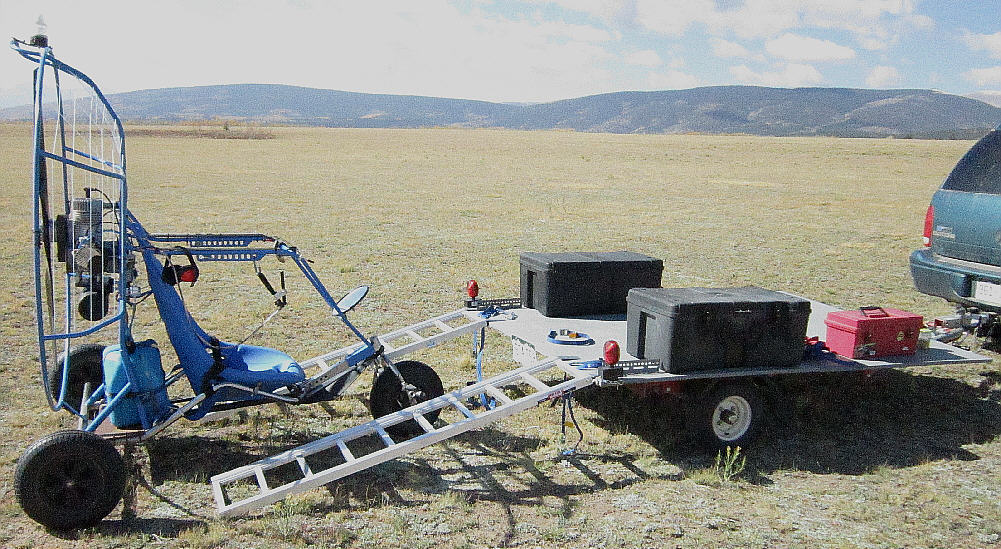
Adding the large front gear box & tieing down the spare fuel cans loads the hitch on my trailer adequately- it was a bit close to neutral balance- not much tongue/ hitch weight- with just the trike & rear gear boxes on either side just in front of the trike wheels, as shown in the photo below. If I were setting up a new trailer from scratch, I'd be moving the spring / axle assembly further to the rear & doing whatever was necessary as far as securing the trailer deck frame in one piece as a non-folding unit.
The 72" long light weight aluminum loading ramps are also sold by Harbor Freight, sometimes on sale for around $80. Each section is less than 15# - easy to handle. I strap mine in place under the trike while traveling. They come as a one-piece folding unit, but it's quick & simple to remove the hing pivot bolts. Chains with open hooks keep the ramps in place while loading or unloading the trike; I also removed excess chain length from what came with these ramps.
http://www.harborfreight.com/1000-lb-capacity-bi-fold-aluminum-ramp-90799.html
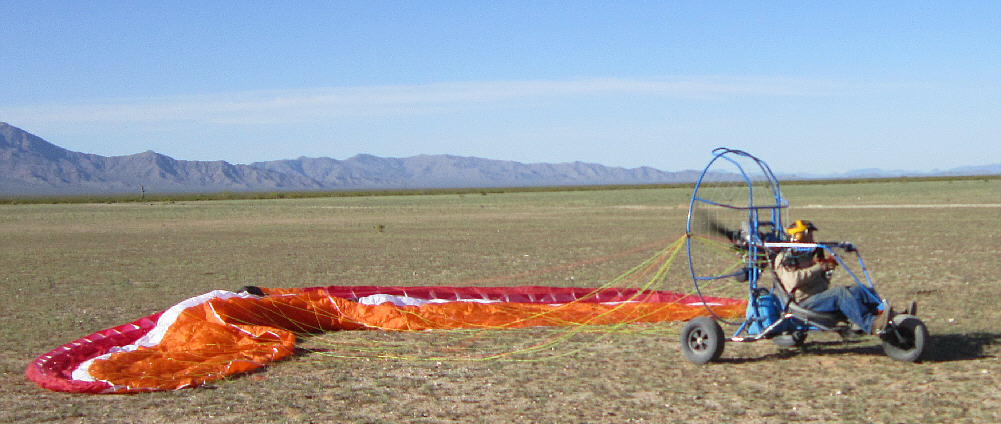
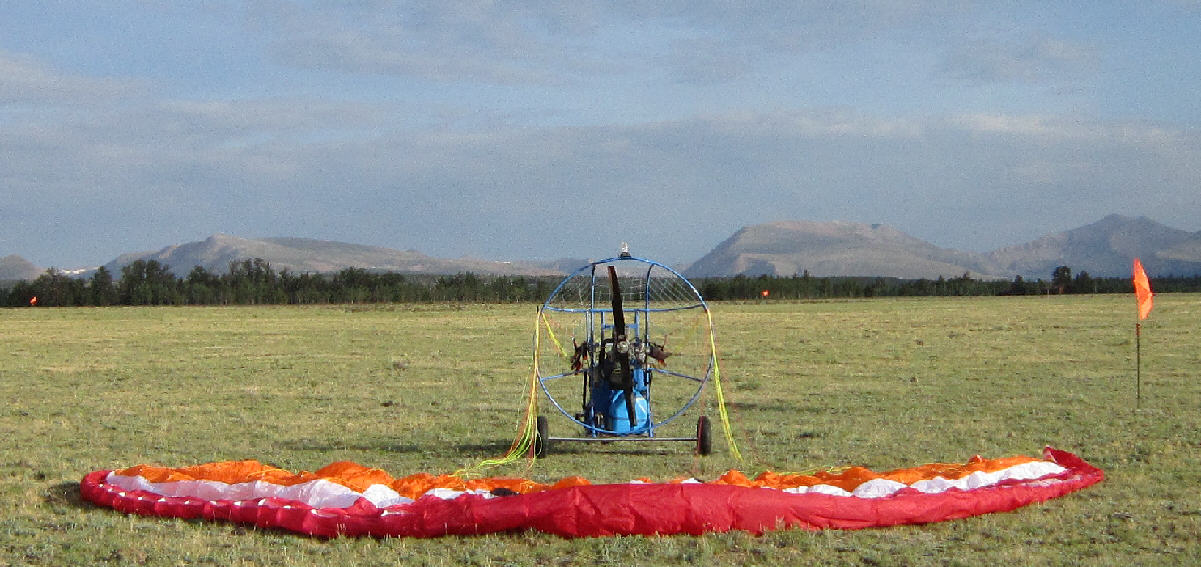
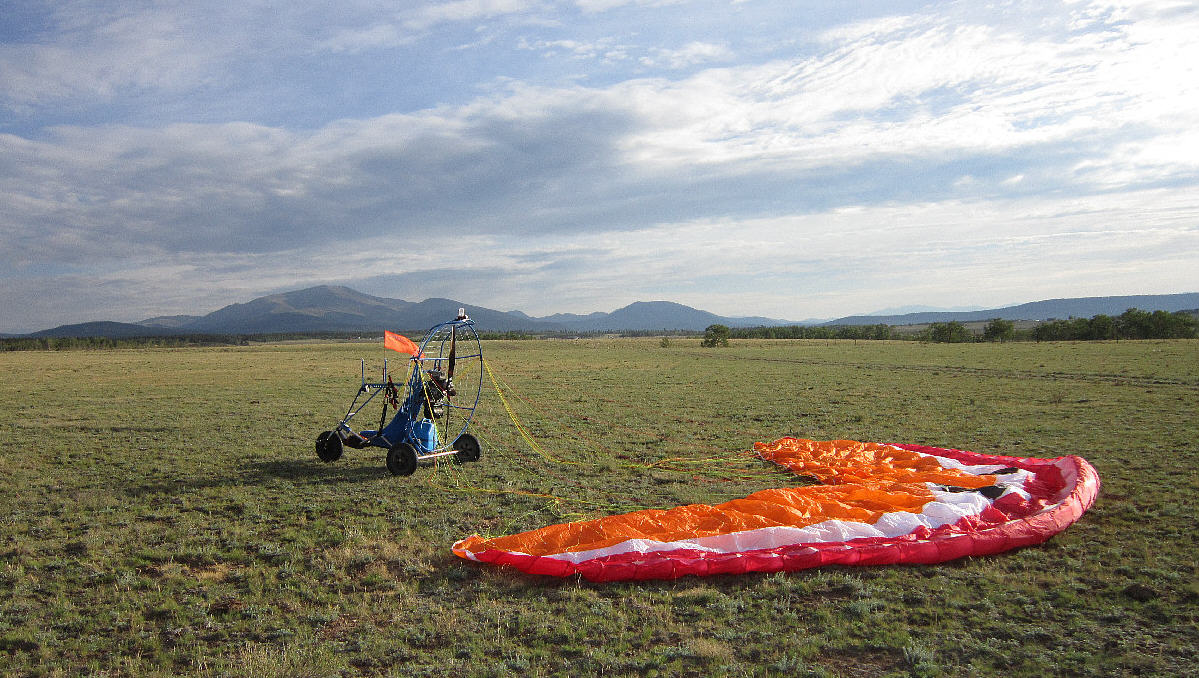
Here's the Bluehawk at Antelope Flats in early October of 2012, ready to load back on the trailer. There's up to 800' of groomed takeoff / landing area in the primary north-south direction across this ~15 acre open aerodrome, with lots of off-aerodrome landing areas available here on the NW fringe of South Park.
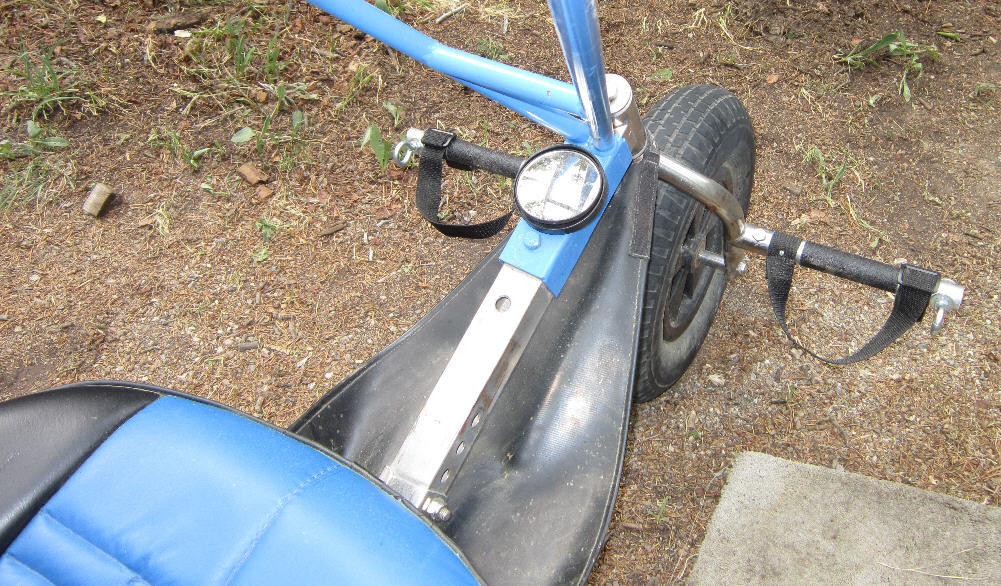
I also removed the large mirror; I found it wasn't really helpful, and obstructed the forward view of the terrain I was flying over far more than I liked.
I've also found that for best handling on takeoff and climbout as well as on landing, I prefer to have the hang points farther forward than what the static hang test might indicate. The motor thrust produces a nose-down rotational moment, so having the trike flying more nose-up gives better handling. (Thanks go out to my friend John Fetz - the prop guy- who offered this suggestion after flying the Bluehawk at the Salton Sea.)
I bought a full set of the wider 16.5" tall tires from Chad at Trikebuggy, for flying in the deserts of the southwest. While this adds another ~12# to the Bluehawk's flying weight, I really like the way these tougher wheels handle. They're especially far more resistant to the hazzards of desert terrain- cactus spines and goat heads. Even my inexpensive Harbor Freight 8" trailer tires were not up to the spiney components of that environment... I had to install some tougher 4 ply trailer tires after being steadily haunted by leaks.